 As told to Tuesday 5th December 2017 Wednesday 20th September: I made a decision yesterday and ran it by most of the crew; we are going to take the Twin Turbo Cortina to the MSA National Finals at Santa Pod Raceway. This was unplanned, but with the weather looking good, unlike the past few weekends, this is the last chance saloon. If I don’t do this we will most likely not get the opportunity until the FIA Main Event in 2018, which is the best part of 9 months away! It does mean sacrificing running in Super Gas, and also crippling my chances of finishing runner up in Super Street Nationally, and the SPRC Super Street track championship. But a lot of work has gone into the Cortina, and being so tantalisingly close to a seven second timeslip, we deserve it to ourselves to give it a shot. It would finish the season where we want to be. With all things right and give the Cortina a chance to show us what’s in her with the same super unleaded tune she had when we got her. So we will give it a shot, everyone is on board, even Bill and Luke Felstead. If Bill had said no he couldn’t make it, I would have canned the idea. So now I have the task of getting everything up to MSA spec, as we must pass scrutineering to be able to run. The Cortina has not been seen in National Event competition since it has been refurbished by us, so it will draw the attention of the officials. I always go on the principle that if the racecar looks fit for purpose, then the officials will hopefully get the same impression. Not that there is anything wrong with her, but you just want to make sure that you have not missed anything, before you get tech’d in. There is a piece of panelwork that I want to take care of, just boxing in the Accusump so as it is not in the drivers compartment. There is also the job of replacing the brake pipe that we shortened last weekend. Firstly I continued fabricating the boxing in that Bill started and we never fitted for the Accusump. The pipework will also have to be extended and run under the floor as well. Once that was finished and trial fitted, it was then painted. Luckily I still had some paint left. Then it was a case of going and getting the braided hose to make the brake pipe, plus some P-clips. Anthony Mitchell at Burtons Power Products took care of all of that. Then a quick trip to Customville to see Steve Dodds and pick up a couple of Wix competition oil filters. Bill suggested it's about time for an oil change, not that it's dirty but it's just good housekeeping, and I agreed completely. I run the motor on Millers Full Competition synthetic 10w-60, I still had plenty of that so no drama there. 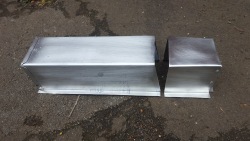
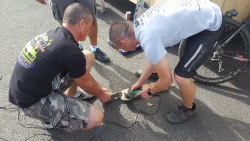
With work getting in the way on Thursday, we will load everything up and go to the track early Friday. All the work will have to be carried out there, but that should hopefully be no major problem. With the Cortina still loaded up from last weekend, it's going to be quicker to take everything there, get pitted in and then deal with it all, rather than unload, disassemble, carry out the work and reload. So we will take the Cortina and get her scrutineered as soon as is physically possible just in case they don’t like something, it gives us time to fix it and get her passed. Worse way, we will get her scrutineered first thing Saturday morning in our allocated time slot of usually 7.15am. Friday 22nd – Sunday 24th September: National Finals, Santa Pod Raceway: You can test all you like at Test Days, RWYB, Fast Ford, Ford Fest, etc. But if you want a decent track, you have to go to a National Event. It also puts you under the spotlight and the scrutiny of all your peers and the more professional side of drag racing. In a nutshell, you better have your sh*t together or you're gonna look real stupid, real fast! Aaron Springford (son of DRE proprietor Gary Springford) and I set off with the rig, and all the tools and parts and pieces you need to operate a team, to Santa Pod nice and early, only to sit on the M1 stationary for 3 hours due to the Air Ambulance landing. Then, upon arrival at Santa Pod, we sat an additional hour due to our tickets and credentials being mislaid. Arriving in the pits late also meant more time used up finding a pitspace. So we lost four precious hours that we needed to get the last jobs on the Cortina finished. With the jobs all done, by now it was 8.00pm. So we missed scrutineering and had kept the crew up late and ate dinner late, and this was just the first day. The jobs needed to be finished were rerunning an oil line and replacing a fitting, replacing the master on/off with a metal one, fitting a couple of other small parts and repacking the chute. Fitting the wheelie bars, remaking and fitting correctly a brake pipe between the two front brake calipers, cleaning the Cortina in and out. Last but not least, changing the motor oil, cutting the oil filter and inspecting it for any metal material but it was clean. I like to show that our racecars are well cared for, I like to create the right impression. This car had not been scrutineered at Santa Pod for years, plus we had virtually rebuilt the car, so there may have been something that we missed. I would have liked to get it done Friday so as we could take care of any problems and take it back Saturday early, but that was not meant to be. 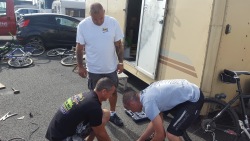
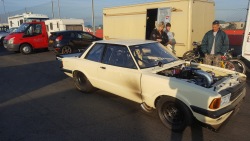
Early 6.30am start as usual for coffee and a catch up with all the crew. Then 7.00am, the crew taking the Cortina up to scrutineering as I went down and signed on as a driver, get my class changed from Super Gas to Super Pro and received my scrutineering slips for both classes. Then straight up to scrutineering, the Cortina went through scrutineering no problem, so back to the pits to prepare for the first qualifier. There was a good gap between the two classes Super Pro and Super Street, about 12 classes for Q1 but then changed as the day went on, so we figured we could get three for sure out of the six scheduled in total. Super Pro is always the second class out, at 9.00am curfew lifts and you can start your engines and 9.30 is startline for Pro Q1 followed by our class Super Pro. I went through the usual startup and drove the Cortina around to warm everything up, transmission, axle, brakes etc. By the time I got back we had already been called, so it was time to get suited up, making sure I had not forgotten anything, then drive down to the staging lanes. As of yet, we do not have an effective way of towing the Cortina easily. So driving down with an already warm motor was okay but I made a note that we would have to keep an eye on that. Being a gasoline turbo motor it builds temperature fast, so you have a smaller operating window before its too hot. Once in the queue, everyone does their job and just gets on with their specific task. Now the whole purpose of coming here is to use the opportunity of a good track to go as fast as we can and learn the new convertor and get everyone familiar with the Cortina in National Event race conditions which is a lot more pressure on everyone. Qualifying slots are class specific, you need to be where they want, when they want and you better be ready. This is also where you start ironing out the bugs and finding the weak points. Super Pro is a big class and has a lot of veterans in it with frighteningly quick kit, it is the quickest sportsman class out there, ranging from 6.00 to 8.99 sec ET’s. We got allocated the right lane for our first run. So as usual I sat on the wheelie bar and put on the Funny Car overboots, then the headsock, Hans Device, Helmet, then the 5 layer gloves. Get into the Cortina and the crew strap me in, I am not being lazy, but with all that gear on I cant see much or reach much, other than what I need to reach to operate the car. Fire up late, as I am running Pete Walters in a blown Top Alcohol Dragster and he will be doing a long burnout. I am again mindful of the engine temp, so I startup late and follow him round once he has three point turned to get into the left lane. Pull round, get spotted in the water by the crewchief, wait till Pete backs up and then get the signal to light her up. Burnout is in second gear, not brilliant but okay, the crew open the door and switch on the Accusump and arm the logger and I pull up to the line. Back into first gear, pull into the lights and put the prestage light on, Pete goes in so I press the transbrake button and start to build boost. I bump in with 3 bumps, it seemed like a long light then Ian runs the tree and I ping the TB button, the Cortina instantly hooks right quite strongly and I pedal and fight to keep her off of the wall. I managed to hold her and keep her straight but I am just inches off of the wall, by now I am sawing thru the gears and still on the wood. Finally at about 1000ft she starts getting a bit loose and rattling the tyres and I pedal again and pull her off the wall. Go thru the finishline, pull the chute, scrub the rest of the speed off and get off the track. The top end crew gather my chute up, open the passenger door and drop it all in. With turbo cars that don’t run $5,000.00 turbos, you cannot shut the motor straight off as the turbos could heat seize so you are better off driving back plus the Cortina has no tow bracket, so I drive back. Once back we discuss what the run looked like which incidentally, contained alot of swearing! The crew reckoned I hit the wall but the cowhorns showed no sign, it was close!! We downloaded the Logger, this showed that I was not on full throttle for all the run which we knew. The tighter convertor was allowing the turbos to build more boost on the startline, it was up around 8-9lb, the previous convertor would only build about 4-5lb. Looking at the timing ticket, we ran an 8.50 @ 156 mph, the 60 ft was where we thought it should be, back in the 1.25 range; with the long light the wastegates were properly banging away on the startline, the Cortina was a real animal on the hit. It was difficult to keep straight and was ugly in the rear tyre dept, really hitting them hard. So Bill Felstead of Comanche Racecars added a one flat of preload and out we went in Super Street Q1; Bill also suggested we +went up from 8lb to 8 1/2lb in the rear tyres. All the usual prep then the burnout, again not brilliant but okay. Armed the logger and Accusump, but this time once in prestage, as I transbraked it and started building boost it started to go into some kind of default mode, seemingly cutting the motor. So I did the best I could and pinged it, running out to the 1/8th and clicked it, still running a 9.58 @ 117 mph. No chute on this run, so I drove straight back and debriefed the crew and downloaded the logger. I wanted to investigate the problem, so did everyone else, we needed to cure this as without being able to spool up the turbos properly all the runs would be compromised. Once on the run it appeared to be fine, it only happened when building boost. Phone calls were made to Jon Hollingworth previous owner and my mate and Gary Springford at DRE, plus spoke to Mark Todd from Street Eliminator who also runs twin turbos. We were grateful for the advice but it was still not cured, so in the end I figured maybe I could roll into the throttle maybe just halfway and that would be enough. Well we found a non public access area where it was safe and tried it, I rolled in a little then a little more and more then thought lets try full. So I got it on the wood and it was fine. The problem was simple, with the tighter convertor, the motor spooled up the turbos slower and the throttle position sensor was getting confused if you went WOT (Wide Open Throttle). So if you rolled into the throttle more slowly you were okay. Valuable lesson learned. There was also a bad steering shake as I slowed down in the shutdown area, not as bad as when the steering mounts broke but still noticeable. On close inspection, the rack was moving in the rubbers, so that was stripped and cleaned and reassembled. Bill also wanted to strengthen the mounts so the crew borrowed some metal (read scaff clamp) and fabricated some pieces to triangulate the mounts. Sefton also borrowed a welder from the Pro Mod Voodoo Hemi team, for which we are very grateful. With that all done we were ready. Meanwhile it had cost us a couple of qualifying sessions and there was only one more round of qualifying to go, so the crew got the Cortina reassembled, I got changed again and we hurried down as best we could. This was the session where we could not make both Super Pro and Super Street qualifiers on account of their being just a class between them. We just missed Super Pro but did make Super Street, so right hand lane again. All the usual stuff, I just about had the temperature of the motor where I wanted it. This time I was going to do a two gear burnout after talking to Mark Todd who suggested it as 2nd gear bands are always weaker then top gear in a TH400 Transmission. To do this I had to press the linelock button mounted on the shifter, start the burnout. Then with the other hand shift into 3rd gear, which meant no hands on the steering wheel, strange but true, it sure felt weird. The burnout was much better and I will do that every time from now on, again part of the learning curve. Once again a real animal off of the startline but I was careful to listen for each gearchange as I could not find the shift on the logger trace between 2nd and 3rd on our first Super Pro run, but this time I was sure I had it. Chute out and no major drama we ran an 8.50 @ 156 mph. Downloaded the logger and it showed that the shift between 2nd and 3rd was barely visible. We serviced the Cortina, ate dinner which was Sefton's famous BBQ, then went and watched Mick ‘Chopper’ Howling play in defence with the Bloodwise Bombers Charity football match. 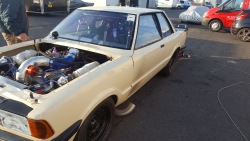
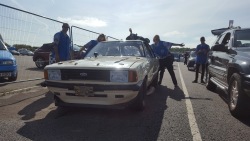
Sunday morning and the usual early start at 7.00am for coffee. I wanted to do two things this morning as I was beginning to suspect that the transmission was slipping in high gear, mainly due to the trace on the logger, and the fact that I was seeing shift lights which are set at 6800 rpm coming on in top gear and the trace only showing 6200 rpm. The data was at odds with what I was seeing whilst driving. So we checked the trans fluid level and we also reset the shifter cable to ensure it was in gear properly. Unlike a Glide, with a TH400 you can actually get a neutral in between gears, so I wanted to make sure it was shifting into 3rd gear absolutely right. The linkage was a little out so that was reset and the fluid level, which you check with the motor running, was fine. First Round in Super Pro, we had John Atkinson in his Mk1 Cortina Estate, John is a good driver and ex Super Pro Champion, but why should I worry, we are going out first round anyway right? In fact Bill asked if it was worth coming back on Sunday as we were only going to see first round (Bill and Luke were commuting not staying) I said no, come back as every pass is important, so they came back. The third class out was Super Pro and, as I expected, John was waiting for me right at the front of the lanes, they are always early. So we paired up, wished one another good luck and be safe, John wanted the left lane which suited us fine, as most of our passes had been in the right. I got on with putting all the gear, HANS, boots, gloves on right away so as not to be too late getting in. During eliminations, there is a set time that they give you to get ready and all the extra gear I wear meant we had to speed up our routine a little to make it. Also you need two crew to get you in and strap you in, which means whilst they attend to you they cannot do their usual jobs. In all the other racecars I drive, once I get in the car I can take care of myself but not in this case. Just like the Pro Mod teams, I need help as I am wearing the same as they do. Meanwhile Sefton and Aaron noticed the wheelie bar bolts were a little loose so, unbeknownst to me, Sefton goes back to the pits gets the tools and fixes it. This is all part of getting to know what the car does and understanding it. We dialled an 8.30, as we had never been that quick yet. I fired up and pulled round, John does a long burnout so once the crewchief spotted me in the water, I sit and wait, I have had my little bit of me time to focus and relax so I am ready. With the signal I start the burnout, hands off steering wheel I shift into 3rd gear, hold the rpm at 4500rpm, get the signal to pull out which I do bring the car to a stop then the crew open the door get some of the smoke out, check tyre temps, Sefton arms the logger and opens the accusump valve and we are ready. Meanwhile, I have already shifted back into first and have checked the gauges and put the fan on as well, as the water temp is already 150 deg. I lit the pre stage and John does the same, he goes in as I start building boost, rolling slowly into the throttle and building up to the 3400rpm launch chip, I watch the boost gauge and it starts creeping up, it reaches about 5 psi so I now start bumping in, three bumps flickers the light, the fourth one puts it on solid. By now the Cortina is banging away on the gates pretty hard, the tree runs and I ping the TB button, pedal a little out to 60 ft as she scrabbles for grip and moves about a lot, then back on the wood and hit the shift dead right on the 1-2 shift, the Cortina is calming down a little and accelerating real hard, the 1-2 shift still comes up before two seconds into the run. I hit third a little early, just to get it done and distinctly hear the motor drop rpm so I know that the transmission is working good. I am catching John, so as I am passing him at about 1200 feet I have eased off the gas and take the stripe. Bill won’t be impressed that I did that, but the racer in you wants to win and instinct takes over. Low and behold, the win light comes on in our lane, I get the chute out, pull round, the top end crew are now familiar with my routine and hand me the chute whilst the Cortina is still running and I drive back. You may recollect that I do this to ensure the turbos don’t heat seize after the run. Back at the pits, we turn the Cortina round and download the data. Prior to that run, I suspected we had hit a brick wall at 8.30 but we ran 8.34 and I had plenty in hand which was encouraging. Next time out was in Super Pro again due to the size of the class. This time, Laura Turboville with a seven second dragster, so with everything healthy I drove down, this round we had a little more time to prepare in the lanes so I made sure I was in and comfortable earlier. Laura broke out in round one, so we had lane choice so I took right; on this run I was going to focus on hitting both shift points bang on, so we dialled an 8.20. I did all the same as before, waited for Laura to back up before starting our burnout, I probably gave it a little more in the burnout as the smoke inside the Cortina was thicker after I stopped. Sefton armed the logger and the Accusump. Into prestage, Laura did the same then staged, I built up the boost all the same as last time, bumped into stage but gave one more bump just to make sure she didn’t flicker the light, the tree ran and once again I had to pedal to straighten her up then straight back on it, this time I was being chased. I hit the shift to second good, and then hit the shift to third good, as I went through the finishline, I saw my win light was on, so Laura must have gone red. It felt quick through the lights, got the chute out and stopped her. Round the corner the top end crew gathered in the chute and put it in the car. I drove back and was met with a lot of grinning, smiling, laughing crew. We ran 8.10 @ 173mph, which was the Cortina's new PB and my fastest ever mph. We turned the Cortina around and downloaded the logger, which now made a lot more sense as I was on the wood the whole run after 60ft, you could clearly see the shift 1-2 and 2-3 so everything was now making sense. With only 12lb boost the 1-2 shift dropped the rpm 1500rpm but on the 2-3 shift the boost is 20lb so the stall speed of the convertor moves higher, which means unless you hit the shift point which is 6800rpm you most probably wont see a big rpm drop on the shift trace. Now I have seen this it makes sense, the other surprise was how just hitting the shift knocked a real chunk off of the ET and built monster speed. 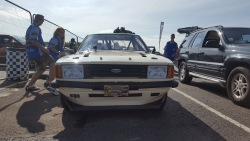
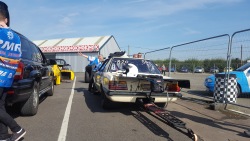
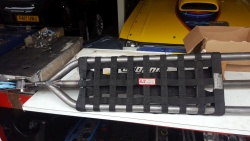
Next was round one of Super Street, where we had qualified last and had 2018 champion elect Leigh Morris first round. I lost a very, very close race to Leigh at the Euros and that was when driving my Chevy Monza, Leigh is a very good driver. So this one would be all on the driver, with no possible way of judging a 10.90 pass in a Cortina that had just gone 8.10. Just to put this into perspective, Leigh was 2018 Track and National Champion but I was currently in second place and in bringing the Cortina I did myself no favours as Dave Cherrett was just 10 points behind me in the National Championship and with him qualifying better than me was now level. So I needed to go a round further. Leigh put me in the right lane which is fine and we did all our usual stuff, arming the Accusump and logger, it was better to keep the routine the same. I launched the Cortina the same as usual but with a little less boost in the manifold off the startline. I paced Leigh, both of us watching the other, and at the stripe or just before he made a dash for it and I did the same, as I went across the line I figured I had not quite caught him, and he took it. But my win light came on and I was ecstatic, I had got around a very good driver. When I saw the ticket my suspicions were right, Leigh took the stripe by .008 but he broke out and I had taken a little off of him on the startline so I did not break out, and won. It's always a close one with Leigh and myself. Back in the pits we turned the Cortina around as quickly as we could, and got ready for the quarter finals in Super Pro. I had the Giles and Hartley Dragster with Dan driving, we decided to push the Cortina down to keep heat out of it. It was difficult to push it felt like a pad was binding so I drove her down. However I could feel that the brakes were getting worse, by the time I stopped in the staging lane, the car was immovable. So reluctantly I had to tell Daniel that he was on his own and after leaving the brakes a while to cool down I then drove the Cortina back to the pits as you still could not push her. Bill set to work and discovered that the rear brake circuit was sticking inside the cylinder, so it was game over. I reported to the Race Director that we were officially broke and told Karen Stevens that she would be running solo in the final of Super Street. Meanwhile Dave Cherrett had lost his first round in Super Street so I was now officially runner up in both National and Track championships. But hey, how could we possibly be disappointed? I was only expecting to go one round in each class, and winning three and leaving undefeated, plus making huge progress with the Cortina, PB in ET and a huge top speed. The round of Super Pro that we missed would potentially have seen us make more progress, as studying the Logger from the 8.10 run showed, that there was a lot left on the table out to 60ft and beyond. This may however prove elusive to start with as the Cortina is an animal off of the startline and most probably needs a four link change to calm her down and make the car more controllable. All in all, there were so many positives, it really was the best way to end the season, we learned so much and left with no major breakage, and the Cortina is still healthy. There is now plenty of time to get everything done in readiness for the 2018 season. Our goal at the beginning of the season was to loose 400lbs in weight off the Cortina which we did. To upgrade the chassis to a 7.50 certificate – done that. To run a 7 second pass, which in all reality was very optimistic, but we very nearly made that as well. Now we are into the off season and there is a whole host of upgrades to be carried out for the 2018 season. Thursday 12th October 2017 Tuesday 4th July: Bill and I worked on the Cortina to remount the steering rack. I had some chrome moly tubing left over that was the correct diameter, 1 ¼” in this case, so we were in business. Bill also bought his big n' nasty tube bender with him. As before, this kind of job needs a lot of planning before you start so when I asked Bill how long this was going to take and he said ‘all day’ I believed him. It was a hot, sunny day and we were at the PMR workshops, so I made sure we had plenty of water in the fridge, it gets hot in the summer in there. As the rack was still mounted and the geometry was right, this really made the job a lot more simple, as we could fabricate all the bracketry and new crossmember without disturbing the rack. The crossmember that the rack sits on is now below the rack; before it was all above. So lots of measuring and workings out on paper, then I drew it all out on card so as to get the shape. As Bill said, with only one piece of tube, it has to be right first time as there is no more tube, so no mistakes. Well, we did get it bent right and then fishmouthed it one side then the other to fit it to where it picked up the main chassis rails. Then I tacked and welded the crossmember into place. The mounts for the rack were again made from card and fabricated from 1/8” flat sheet steel. With these made in card, they were then made into metal and were welded to the crossmember, so the rack was ready to be removed from its existing mounts and refitted to its new home. This took a little time to make it all look right and remove the old mounting brackets. Then, once all was in place, additional bracing was fabricated and mounted so as to triangulate the rack crossmember for extra strength. Whilst Bill was dealing with that, I went over the rear tubs and fabricated some small pieces and seam sealed some of the boot floor to seal it up a little better. To be fair, I didn’t get a lot of smoke inside the Cortina when I performed a burnout but I wanted to sort it. I also adapted an old window net to fit the wheelie bar to help prevent the parachute from getting tangled in the bar which would not be good!! At Classic Ford we used gaffa tape as a temporary form of webbing and it was successful, so I copied the design. I have also been going over the Cortina carefully from a safety point of view, as we have Mark Norton and Steve Reed from the UK Chassis Tech and UK Safety to recertify the Cortina as the next planned track excursion is to be an MSA National Event at SCR over the August Bank Holiday and we are already faster than the 8.50 chassis tag that the Cortina currently has. We need it upgraded to a 7.50 to run legally, so Thursday night we will hopefully achieve that, which is an important milestone for this project. On the torque convertor front, It's Back! JW Performance Transmission have worked their magic and we now have our convertor back ready to be refitted. Many Thanks to Eric Seccaur at JW’s for all his help and advice. 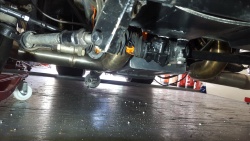
Thursday 6th July: Bill and Luke from Comanche Racecars met at the PMR workshops to welcome Tech Inspector Mark Norton. It’s always nice to see Mark away from the track as it means you have something finished and ready to make the next step. Mark examined and, true to Jon Hollingworth's word, the bar that Bill had fitted under the transmission was all it needed to get a 7.50 chassis tag. Monday 24th July: With July being so busy at Santa Pod with the lifestyle events, there was no real rush to put the Cortina back together, plus both Bill and I were busy at work. Sadly, there are no more North Weald events this year so no chance for some local testing either. Bill and I met at the PMR workshops and spent the whole day destroying the propshaft tunnel, really! To start with, we were only going to replace the front driveshaft hoop so as removing and refitting the trans was a lot easier. But upon closer inspection, it really was easier and quicker to just replace the whole tunnel section. So it all went, which made re-installing the transmission a lot easier. That was after removing the drivers seat, harness and moving all the ECU and wiring, dash etc. Aaron Springford also lent a hand and although very heavy and having to install the transmission through the door, we got it back in and no-one was seriously hurt. All the pipework was connected up to try to stop any leaks, transmissions always manage to make a real big mess, especially when partially full of fluid and very heavy. Then once the convertor spacing was checked and verified, it was bolted up. You want around 2-3/16th clearance according the JW Performance Transmissions. After clean up, it was then time to connect all the electrics up temporarily, fuel her and charge the battery. We double checked everything then ensure that we had put enough fluid in the transmission. The stick said we had, but TH400 Transmissions hold a huge amount of fluid and I suspected there was not enough in it. So we fired up the motor and ran through all the gears, all appeared to be working perfectly, we put her through a heat cycle and shut her off. The only thing that had given up the ghost was the Accusump which no longer held pressure, that will have to be replaced. It doesn’t sound much, but all this made a long 12 hour day. 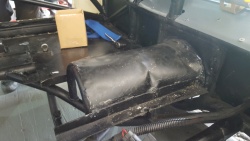
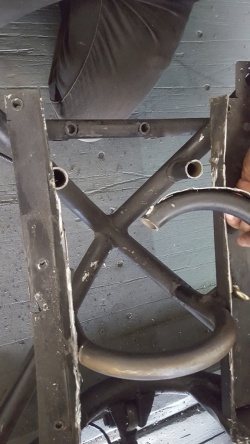
Thursday 3rd August: With UK Top Sportsman at the Mopar Euronationals last weekend, there was not much time this week as we ran the Chevy Monza at the event as well as organising it. It was a good event with a lot of very fast seven second doorslammers in attendance and we got the event finished as well. Today was just small stuff really, I gave the Cortina a good clean and made sure nothing in the way of small pieces were lost. Also I checked all the electrics worked like water pumps, fans etc. Tuesday 22nd August: Bill and I spent the day fabricating and installing the new removable transmission tunnel. It was the same shape as previously and managed to weld it all in with the minimum of damage to all around it. Plus I painted it when it was finished so that it won't rust. We used some 16 gauge sheet steel and made sure the propshaft loops were of the correct materials as per the rule book. It doesn't sound much, but again it took all day. Unfortunately, this is when I had to break the bad news to Bill regarding not going to SCR, on account of the trailer bearing problem. Bill knows these things sometimes happen, so no problem. 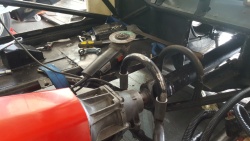
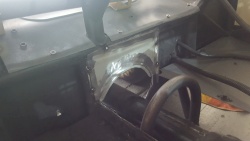
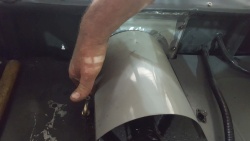
Wednesday 13th September: Bill and I were back on the case. Over the past month, we suffered a major problem with the doorcar trailer which meant that we were unable to take the Cortina to SCR for what maybe was the very last meeting there. Naturally, as we could not get the bearings to repair the trailer, the weather was glorious and it was a great event. I could have cobbled the trailer bearings together but there was a design flaw in its current setup and it needed re-engineering and doing properly. Having spent the whole of Saturday 12th August stranded on the M1 J10 with a dead trailer, I was not about to go through that again. So I took the time and did it right, hopefully that is the end of the matter. After missing that Shakespeare County Open Nationals event, I already had a back-up plan of the Fordfest at Santa Pod Raceway, Saturday and Sunday 16th – 17th September. So Bill and I embarked on another 12 hour day going through the Cortina and prepping it for the weekend. Firstly we had housekeeping to do on the motor. The valvelash needed checking, along with the valve springs for any breakage. The process is a little less than straightforward due to the positioning of the motor, but once the rocker covers are removed, the lash was checked and was fine. No broken springs either, so the motor was buttoned back up. Next was the reassembly of the interior, i.e. refit the drivers seat, also refit all the interior panels properly. We had previously fired the motor to check the transmission was working correctly when reinstalling the convertor. Next, the transmission tunnel and the wiring had to be properly installed. We connected up the shifter wiring and the linelock button and finished assembling the shifter itself. The front also had to be fitted and the bonnet, then the rear wing and the boot assembly. Lastly, the motor was once again fired up, and we reversed the Cortina out of the workshop. It was now that I discovered that there was not a lot of drive in the transmission. I had seen this before with a TH400 and signifies low trans fluid. So I drove back into the workshop and painstakingly filled the trans, ran it again going through the gears and checked again. All in all, I probably got the best part of another gallon in the trans before it registered right. Then it was ready for loading. I also had another go at repairing the driveshaft sensor, hopefully I will be more successful than my first attempt. Then we loaded up everything that we needed for the weekend, part of all the work that needs doing that nobody sees. The trailer was also checked once again for wheel bearings, I do not want a repeat of before. Saturday & Sunday 16th & 17th Sept – Ford Fest: A leisurely trip to Fordfest at Santa Pod, as our tickets did not allow us entry until after 12.00 Saturday. To be fair, after spending nearly the last two weeks at the track at VW Action, then European Finals the late arrival suited me fine. It allowed time for a nice breakfast and a unrushed journey. Arriving on the dot of 12.00, the crew arrived at the same time and we went in and got pitted. The objective of this event was to evaluate the new JW Transmissions torque convertor, make sure everything still worked okay and make some hits Saturday just out to 330ft. As much as anything, to get me back in the saddle with a turbo car and get the crew up to speed with the systems that need switching on and when. Alas, none of this got done as the rain (which was NOT forecast) started as soon as we unloaded the Cortina. It did briefly stop long enough for us to get the wheelie bar on it and for me to drive it around the pits to get some heat in it and ensure everything worked. Also, crewman Sefton Whitlock got time to go over the car and nut and bolt it. It’s always a good idea to get another set of eyes on the car. But that effectively was it, the weather that came in was nothing like what was forecast. To be honest, if that amount of rain had been forecast, I doubt we would have gone. Sunday dawned and once again it rained off and on during the early morning. As usual the whole PMR Crew were all up and drinking coffee at 7.00am in the RV. But with the rain, not much else got done, other than a film crew had latched on to us from Fast & Loud who were filming a Mk3 Capri they had fitted a Coyote SBF crate motor into and were in the same boat as us - bad weather stopped play. As is usual with Fordfest, despite the weather, it still filled up fast, it's a car meet as much as a drag racing day – a lifestyle event. The track crew were working away, trying to dry a very wet track and we were told that they were aiming for a 1.00pm start. The morning ticked by, the Cortina by now had been uncovered and was creating quite a stir, a lot more than the Mk3 Capri with £40,000 having been spent on it!! We fired her up to dry her out a little and gathered a huge crowd, once that was done, shut her off and went about getting her ready for possibly running, tyre pressures set etc. We were told that the time in the programme of 2.30pm would be our first run, so we aimed at that. Not before we had tried to start her again, only to find an uncooperative car. After much head scratching, Darren Scannel, a good friend of mine, suggested that if the voltage was less that 10.5v when cranking the motor, the EFI will not work. I had unfortunately left the water pump running earlier and the lazy battery was the culprit – and me of course! So with a jump off of the spare battery and jump leads, the motor fired no problem. By the time I had driven around a couple of times to get some warmth in everything, it was time to go. So took all the gear, Hans Device, Funny Car boots and gloves, etc. All of this is quite strange, and I have to get used to it all, as you just don’t use all that stuff when I compete at MSA National Events in Super Gas and Super Street. So we drive down the old fireup road with all the rest of the demo cars. We have already been told that due to the water seeping up thru the track we are all running singles in the left lane. I intentionally positioned myself at the back of the queue so that I had plenty of time to get the safety gear on and in the Cortina. I fired the motor and pulled round, pumped the brake for the linelock, started the burnout in second gear as usual but the linelock did not hold, so rolling burnout it is then. Once completed, I tried to brake, no brake, the pedal goes to the floor. So I then drove off down the track and took the first exit and waited for the crew to arrive so that we could push back. I was disappointed, but better it happen there than on a run. Got back and Bill Felstead of Comanche Racecars quickly diagnosed the problem as being a split hose on the driver's side front brake. With the help of Martin Hill, we managed to remake a hose, just in time for the second demo session at 4.30pm. This went better, not enough rpm in the burnout and the Cortina started to turn in the burnout on me. But there was just enough in the tyres heatwise, I came up to the line, Sefton opened the door and switched on the logger and armed the accumulator. I lit the Pre Stage Lights, made a quick check on all the gauges, all looked normal, transbraked it and built up boost and then bumped it in using the bump box. The bump seemed a lot less violent, I got in and lit the full stage beams. The tree ran and she hooked well, pulled second as soon as she settled and pulled third soon after, for the first time I could actually feel and hear the gearchange. At about 770 feet, it started making a big move towards the centreline and I peddled it then back on it. I ran a 8.55 @ 159.60, then pulled the chute, which didn’t feel like it deployed properly so then got back on the brakes as I was running out of real estate fast, just getting it stopped about six feet into the field. The firecrew and I pushed her out and round the corner. Once out of the way, I refired her and drove her back. Luckily the data downloaded from the logger and that was worth its weight in gold, otherwise the weekend would have been wasted as with a run which was loose and was nowhere near the seven second ticket I was looking for, not much would have been learned. But with the logger, preliminary results show that the now tighter convertor meant that off the startline, the Cortina appears to have slowed down with a 1.35 60ft as opposed to a 1.22 best with the loose convertor. This was the tradeoff that I suspected on account of the turbos not being allowed to spool up quite so easily, the motor's rpms being kept lower, which is where the turbos get their speed from. But with a tighter convertor, the mph will be a true reflection of engine speed. I did check the logger and it seems that I did have the motor spooled up and on 4lb in the manifold on the startline prior to the launch, but it felt alot tamer. The drive off on the line also felt more controllable, probably due to the fact that the motor could not now push through the convertor. Whenever you make a big change to a racecar, the crash test dummy (read: driver) has to contend with it. So I am personally always apprehensive as to what's going to happen this time. In this case it was not too bad AFTER the run, it you can call ending up in the field okay! Monday 7th August 2017 Thursday 18th May: It was first day back on the Cortina since North Weald, which had been very successful. Bill and I set to the list of jobs. Firstly weigh and scale the Cortina properly on a flat surface, this meant firing her up and moving her into my workshop that was now empty, since the Miller 4-Link Dragster had been serviced and was loaded into the trailer ready for teaching and then the FIA Main Event. Once in, we set up the four corner scales and put the Cortina on them. The Cortina had previously, prior to the refurbishment and weight loss, had a small tendency to go to the right off the startline, so we worked a little on evening out the weight seen by the back tyres with driver. It didn’t need much, plus we figured there was still just a touch of preload in the top RHS four-link bar. Other than that observation, we left it alone as the effect of 400lb weight loss would need to be seen on the track. As it sits now, it's gone from dead on 50/50 to being about 3-4% nose heavy. This was expected, as the massive radiator and chargecooler, heat exchanger and pumps are still remaining, as it's still a pump gas motor. The mapping of the instant center in relation to the 100% anti-squat line has also changed a lot too. Without changing anything apart from the weight removal, we need to see how it behaves before we make a bar change. The brakes had worked, but the pedal was a little spongy so needed bleeding again, plus the pedal pad needed to be contoured as it hit the transmission tunnel when you really stood on it. The brakes were bled and came up nicely. The pedal now had also more travel once it was contoured. The last job was to add some bracing to the brake cylinder mount as there was a little flex when you really stood on it. So Bill fabricated the support bracket and welded it in. Meanwhile, I mounted and plumbed in the fuel pressure gauge; I had all the parts but just didn’t have time to fit it prior to North Weald. Then I removed the oil filter and cut it open with a special tool to inspect what was in the filter. There were some small pieces of metal, but nothing more than I expected, you always get some material from the valve springs etc. So finding a little was normal, what you don’t want to see is lots of metal, or worse still copper as the only thing copper in a motor is bearing material, and if it's down to copper, it's already done. Lastly, the bodywork at the back where the wheelie bar exits needed tidying as it was done very quickly and needed shape. Bill made an excellent job of that. 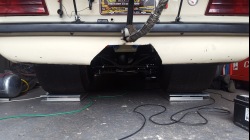
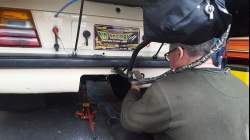
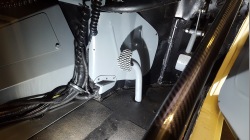
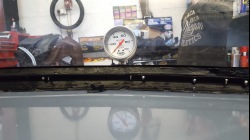
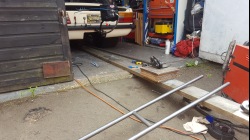
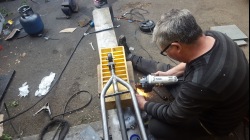
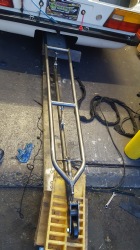
Tuesday 30th May: We just got back from the FIA Main Event last night, where we ran the Monza and dragster with Tony Morris, Martin Curbishley, Mick Howling and myself driving in Super Gas, Super Comp, Super Pro and Super Street respectively. I delivered the chrome moly wheelie bar that I ordered from Andy Robinson Racecars to Bill at Comanche Racecars in Kent, so that Bill could get some more of the parts done, ready for Thursday when we would build the bars on the Cortina. Thursday 1st June: Bill arrived early at around 8.00am and we got cracking on the bars. Bill had already got the bends done, so it was more a case of making it all fit to the Cortina. There is a lot to take into account when building and fitting wheelie bars. There most certainly is not a one size fits all, it really depends what you need the bars to do. This might sound simplistic but it's not. This is what we needed: being a twin turbo car with weight, I wanted the bars to control the launch without upsetting the rear of the car and cause it to unload the rear tyres. To do this it needs to be enough to control, but not hit too hard. The adjustment is never a lot, so you need to be in the ballpark to start with. The second requirement is kinda future proofing the deal, as with all turbo cars, the power is at its strongest at the top of a gear. As we have all seen on the internet, they have a tendency to climb. So to ensure it don’t climb too high, you need a long wheelie bar. As a rule you want the bar 90% of the wheelbase, our wheelbase is 105 inches which means we need a 90+ inch wheelie bar. Bill wanted it to be a mono, so there is less chance of it steering the car. There were also all the mount points and bracketry on the nine inch axle casing that had to be fabricated and welded in place. None of this could be done until the wheelie bars were made, because once made we then had to work out where it would fit so that we got the bar height right. The previous bars we used were too short, the bar height was six inches, but with the new mono bar being 30 inches longer, the wheel had to be nine inches high to allow the same squat on the rear of the Cortina. So there are a lot of parameters to take into account, which is why it took Bill and I 15 hours to get it right, so note to self, wheelie bars take three days to fabricate and mount, not two! It's not the first time Bill and I have put in a 15 hour day on the Cortina, it won't be the last, but if we wanted to be at Classic Ford for the Face Off competition which is heads up Ford cars only, we needed to finish the wheelie bar off. So at 10.30pm it was finished and now we could prepare for Classic Ford at Santa Pod. 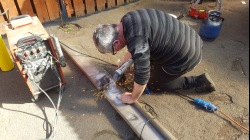
Friday 2nd June: I spent the day making sure all was good with the Cortina, I changed the engine oil, using Millers 10w60 fully synthetic, charged the battery, packed up the race fuel, all the tools and trackside equipment that you take to operate at the track. Believe me you need a lot of stuff. Then I got the trailer and loaded the Cortina, doing it all on my own, I only got drowned by heavy thundershowers twice and the Cortina got drowned once. I had everything finished by the evening, ready to go. Saturday 3rd June: Classic Ford at Santa Pod Raceway is actually on Sunday but you need to get in early and prepare to avoid doing the headless chicken on the day. Classic Ford is a very busy event, so experience has taught me to get there early as I don’t do headless chicken. Plus all the small jobs like fitting the wheelie bars and setting up their height, doing a nut and bolt check and any other jobs, giving the Cortina a quick clean etc, had to be done. This was our first time at the track with this car since we rebuilt it so a hit or two Saturday will give us valuable information for Sunday's race. We arrived a little before 12.00 noon Saturday, got in and pitted. Then we unloaded the Cortina and started preparing, as we do all our cars. We checked the tyre pressures, put the battery on charge, and fired up the gennie (no plug in power, its not a national event). Whilst the crew got on with that, I went and saw one of the organisers to find out when we were running on Sunday, then went and had a look at the track. The RWYB was reasonably busy so I walked the startline to see what grip was available. With mainly street cars, their wheelspin starts with a harder rubber compound tends to take the glue off the startline. Being a warm day it wasn't terrible, it is what it is at RWYB. I signed on for the RWYB and went and found Bill and Luke from Comanche who actually had four of their customers and former customers testing that day. The main one was Ray Tucker whose beautiful Twin Turbo Corvette was debuting as well as our Cortina. Ray's Corvette is exquisite and very trick, it’s the culmination of about four years work and is a £100,000+ piece. Back at the pits, we fitted the wheelie bar and then checked the height. There is a fair bit of bend and play in a nine foot bar, so I pre-loaded the rose joints to make it stiffer and lowered it as well to get nine inches of clearance. I fired up the motor and took the Cortina for a little drive, to ensure we had bled the brakes okay and also that the adjustment to the shifter worked, which it did. Lastly, as I had oil changed the motor, I wanted to get it warmed up and ready for a pass and then check the oil level again. With all that done, we topped off the fuel and set the tyres. Off for our first run for Saturday, the RWYB was pretty busy so there was an hour wait in the queue. I got down there, pulled over and went through the process of putting on the funny car boots, HANS device, head sock, helmet and five layer gloves. I climbed in and got strapped in by the crew chief and Joe. I got the signal to fire up, got some heat into her, it’s a pretty hot day anyways. I pulled round, got spotted in the water, linelocked her and into second gear for the burnout. The line lock didn’t hold too well, which is usual for most cars on their first pass of the day with cold brakes. I came up to the line, Joe armed the logger, not too much smoke in the car, clicked on the pre stage light. I hit the transbrake button after taking just a second or two to make sure all the gauges were showing what I wanted. I rolled into the throttle to build boost, bumped in lit the stage lights and pinged it when they ran the tree. She hooked pretty okay but I could feel and hear she was struggling for grip, had to hit the shift into second real quick and steer all at the same time, was on and off the throttle to get her down the track. I returned to the pits with no drama, but the track just wasn’t there for this kind of horsepower. We ran a 9.2 at 132mph. So we downloaded the data once we remembered how to do it again! I elected not to run her again Saturday, there was nothing to learn, not enough bite for 1500hp with all the street cars pounding on it. I decided to wait until Sunday and some more track prep. Upon checking the data, I found no oil pressure or fuel Pressure trace, so we tracked down the wiring to find that a switched 12V power wire simply needed reconnecting to the two sensors. Sunday dawned, we were on the Cortina at 8.00am, but I fed and watered the crew with McDonalds first, and then went through some usual prep work, tyres, etc. I elected not to go through the valve lash, as with only one pass on the motor, there was no reason to do it. So I cycled down to the startline to see what work was being done, signed on and checked the schedule again so I knew when we were running. Our qualifying slots were 10.00am call for 10.15 startline and 2.00pm call for 2.15 startline, with the Final for the two fastest at 4.00pm. So we needed to get everything ready for the 10.00am call. Being that we had been racing the previous weekend at the FIA Main Event, everything went real smooth. Although this is a new car to us all, the morning routine is well practised. There were some nice pieces there, the Mean as Hell Ford Sierra ex Pro Mod car, plus a few more 9 and 8 second cars. When the call came we were told to drive up to scrutineering then back down the old fire up road to the startline on account of the rwyb lanes being full. I knew that would be the case but being a hot day again it put plenty of heat into the motor. We parked up and got ready, I elected to hang back a little to see what the competition would run. There was the usual prep process of me being dressed by the crew then helped me in - unless you do that you would bash the crap out of your crash helmet on the cage every time you get in. We ended up left lane which I figured would be a bit of a problem on account of where I fitted the rev counter with regard to seeing the tree. Guess what, I was 100% right, so once pre staged I had to bend double to see the tree as I bumped in. Got staged and pinged it, she hooked a lot better and I got in a reasonable pass but not perfect and I had to pedal a little and was late on the 1-2 shift, but I was still about two pages behind the car at this stage. There really is no substitute for seat time and this was after all, our first ever full pass. So I am feeling the car for vibration, trying to keep her in the groove, hitting shift points and listening as well as keeping good spatial awareness, where I am and where the other car is. Once I got into the shutdown area that’s where the fun started, I was probably around 150mph plus so I braked quite hard which worked out well, the brakes were doing their job, but as is not unusual the oil pressure in the motor started to disappear rapidly, so I lifted and feathered a little but by that time the oil pressure disappeared completely so I switched the motor off. Just as I did that the oil pressure came back, then I realised that I was running out of real estate fast. I was too slow to use the chute so I stopped in a straight line and just missed the last exit. The fire crew had to push me back to clear the track which only took a min or two. I got the gear off, HANS etc, then restarted the motor which fired up no problem, got oil pressure straight away although it was a little low. In simple terms, a turbo motor heats up the oil so quickly that it's normal to have lower oil pressure but as a driver it’s not what you wanna see. I thanked the fire crew and drove back, with two notes to self, first use the chute next pass and arm the oil accumulator before the pass. 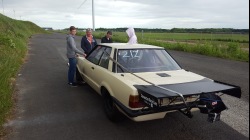
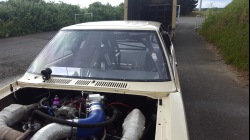
We ran an 8.48 at 158mph so we had qualified No1 for now. We then had four hours before the next session so we turned the car around as usual, fuelled her and charged the battery, I also removed the air filters and checked the turbo bearings, as they can heat seize if you click it hot, which is what I had done. All was good so all reassembled and we downloaded the data, which now had fuel and oil traces, it also showed that although the oil pressure gauge showed zero when I clicked it, there was still some oil pressure, the gauge actually reads under what we actually have –I have no problem with that! So the chute was unpacked again and checked again as we were certainly going to be using it on the next pass. Its good practise to air the chute every once on a while and get the crew used to it, but it’s always the driver's job to pack it. Its your ass in it, no excuses. Also to prevent the chute becoming tangled up on the wheelie bar we made a simple latticework on the bars with racer tape to prevent this. Then I checked the function of the chute pull lever, so that I knew how far I needed to move the lever to deploy the chute as we were going to need it. The Cortina was very well received by the public and most of the crew were at stages engaged with people on technical matters. For some time now, a lot of Fast Fords have been turbocharged. We got called at 2.00pm and made our way to the startline down the old fireup road. Upon arrival, Santa Pod startline crew Ian Marshall and Dave Warren closed the track and did some quick housekeeping and sprayed the track for us, which gave me time to get in, settled and focused. I got the signal to fired up, I had gone down early this time to get the right hand lane, no more staring around the rev counter! The burnout was good, Joe armed the logger and accumulator, the crewchief bought me up to the line, I bumped in on boost and pinged it. Grabbed second gear real fast, and then with a tiny pedal to settle her on the 2-3 shift I kept it on the wood. Just hitting the limiter in top gear at about 11-1200ft, drove into the chute and then let the chute do the work and made sure I took a wide arc as I came off the track to ensure the chute drogue didn’t get caught up on anything. Well that was a full pass, or as near as was possible on the day. I kept her running, but with no-one to put the chute in the car, I had to switch off and get the chute myself. Once retrieved I restarted her and drove back to the pits. I was a little surprised to see we had only run a 8.32 at 168mph, but it is what it is, so we downloaded the data, checked the motor and turned her around. The next run was the final and we were running against Ian Walley who has a wicked MkII Cortina with a 102MM Single Turbo SBF, Ian usually runs at York so I hadn’t seen the car for a while. It was a race against the weather as a storm front was approaching fast. Ian was having trouble getting temp out of his transmission, so I waited for him, when he was ready we went down. This time down the usual pairing lanes as the rwyb was emptying out. I chose right lane and my plan was to run her to 1000ft and then just maintain rpm, I didn’t want to hit the high side chip again. Both cars fired up fine and did their burnouts, Ian staged immediately so I followed in as soon as I could, I knew his trans was cooking. Pinged it we left together and never saw him past 60ft, took it to 1000ft and clicked it, running 8.50 at 154mph, got the win light, job done. Then it rained and we all got drowned loading the Cortina and eventually left with the winning Cortina that had done everything we asked of her, apart from run a seven but with the data from our runs and from Jons old data, I felt sure I could pinpoint what needed to be worked on. Monday 5th June: I had a chance to really analyse the data from our passes and from previous owner Jon Hollingworth’s old data. Well, the story it told was what I kind of suspected. As our 60ft time on the 8.32 run was 1.22, this was at least 2/10th up on Jons 60 ft on his best ET 8.60 and by the time we got to 330ft we made up a little more but from there on we were no faster, plus our mph was lower than Jon's terminals of 172-173. Add to that the fact that we had a taller tyre and our theoretical top speed on the chip was now 208mph, not the 168mph that we got on the chip going through the finish line. When I compared the driveshaft speed to the motor RPM it became clear that even before with Jon, it had recorded an engine speed of 7200 rpm and a driveshaft speed of 5000 rpm. This shows massive slip. If you followed the trace to the finish line, the motor speed just got to 7350rpm and the driveshaft kind of caught up a bit with 6150rpm but never got close. When I looked at our traces, I couldn’t even find an rpm change when I shifted from 2nd to 3rd, in fact the rpm drop from 1st to 2nd was only 300rpm and should have been at least 1000rpm. The only chance we had to improve was on the hit as the launch control only has 5lb of boost in the manifold, as soon as the boost ramps up it just blows straight thru the convertor, which explains why it has not seen a drastic reduction in ET. When I spoke to Jon, he confirmed that the loose convertor was to help the block tread tyres grip on the gearchange as it had a habit of knocking the tyres loose. I then spoke to Eric Secaur at JW Performance Transmission who said with a turbo convertor they look for no more than 3-4% slip, not the 33% we were experiencing. So Bill and I will pull the transmission and get the part number off of the JW built convertor, so that Eric can pull the file and let me know if there is enough scope to tighten it up sufficiently. 
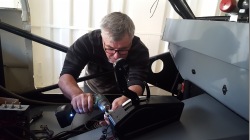
You have to keep your feet on the ground here and not be too optimistic regarding just how fast she will be with a locked down tight convertor. The loose convertor means that the Cortina was never close to fulfilling its potential when Jon owned her, the block treads they had to use in street eliminator to get from point A to B meant you had to use convertor slip so as not to shock the tyres. We now do not have such a restriction, we also have no exhaust back pressure as we can use cowhorns, we also have 400lbs less weight, lastly we have slicks and taller gearing to let it eat. So with a tighter convertor, in a real world scenario we’ll be able to see how much difference it will all make. Remember, the power of the motor is unchanged, it's just how it sees the track and how we can now apply the power, its going to be fun to watch. Tuesday 13th June: Bill and I both worked on the Cortina today, the first job was to remove the transmission, so that I could get the serial numbers off the JW Transmissions torque convertor. With the removable floor, trans tunnel and doors, the job was not a long affair, the only tricky part was the remaining trans tunnel. So we both decided that it had to go, so next week we will make the remaining tunnel removable as well. The transmission is simple, too heavy to now have easier access. It only took an hour to get it out. We then turned our attention to the steering rack mounts. On the last pass, I felt the steering do something weird, the straight position on the steering wheel moved in the shutdown area on the last run. We investigated this and found a mount had moved. We figured, now the Cortina was wheels in the air on the hit, that the shock had somehow cracked one of the welds. The solution was simple, we would mount another small tube crossmember just for the rack and triangulate it for strength. Other jobs were also discussed and planned, an undertray, also cleaning, normal housekeeping maintenance and replacing the black gauges with silver so that they match. Now the Cortina was unloaded and in my workshop, there was plenty of room to work on it. 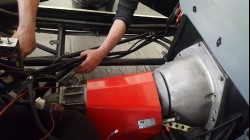
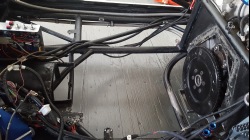
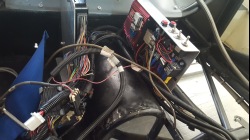
Upon reflection, there were a lot of things that just flat out worked that need to be mentioned, as whenever you build these things, its an educated guess at best. The wheelie Bar worked real well, no complaints so far. Despite being mercenary on what got removed from the Cortina - and there was a lot - there seems to be nothing other that a quarter bumper that came off during a run. None of the panels seemed to move, the doors stayed put, the tops of the doors didn’t get bent out due to the wind at speed. The whole aero package seems to be happy so far, the Cortina definitely felt stable and was not unsettled when the chute deployed, which can be a problem with a lot of cars. The transmission rebuilt by Terry Robbins at Robbins Race Cars seems a-ok. The motor despite our unfamiliarity with it does not appear to have suffered and worked perfectly, doing everything we asked of it. The steering and suspension worked fine, the brakes were good, the driver's position is good, no real complaints. So all in all a lot more positives than negatives at this stage. Saturday 16th June: It was a really hot day today, so a 7.00am start on the Cortina, we cleaned her up after the exploits of Classic Ford, plus removing the transmission. We had already had a courier collect the convertor and it's on its way back to the States for a freshen, and to have the stall tightened up. I removed the black gauges from the dashboard and replaced them with the silver Autometer gauges that Tony Morris brought over for me. Now all the dash matches, a small point but it keeps the look right, so it was just as well that I marked all the wiring on the loom behind the dash so as to make the swap easy. The temperature gauge is electric and I had to disturb a lot of wiring to fit the new ones. I also secured the quick release fittings more firmly, as I had already refitted the oil pressure line wrongly once, which you find out when you fire up and have no oil pressure registering! Luckily there was no mess from the loose pipe but it highlighted a potential problem so I fixed it. Tuesday 26th June: I called Eric, as although it seemed that the courier company may have lost my convertor (which is why I insured it), I got notification whilst at the Summer Nationals driving the Monza in Super Gas and Super Street that it had arrived at JW’s in Florida. After discussing it with John Winters Jnr, Eric and I decided that changing the stator to a P/N 026 stator was the best move as it allows slip low down so it makes spooling up quite easy but locks up tight when up in rpm. For our combo that’s perfect, it’s a little more cost but it will do the job right. It took just 24 hrs to get the convertor upgraded. My courier collected it on Thursday and I had it back with me here in the UK on the following Tuesday. Nice. Wednesday 15th June 2017 Wednesday 5th April: Bill wanted to get the new Dashboard mounting finished today. I had ordered the Dzus plates and springs from Mark at Hauser Racing on Monday and they arrived the next day. So Bill got cracking on that, meanwhile I got stuck into framing the front windscreen ready for the screen to be mounted. The best way I have found is making a wood frame that you use to bring the level that the screen sits on flush with the roof, pillars and scuttle. Because a screen is usually held in by rubber, when using lexan you have to bring the height up so that you don’t get a sunken in screen. This will also aid the aero on the frontal area. But it’s very time consuming and with the shape of the screen you have to bend and shape the wood. I used 15mm x 12mm battening from B&Q, plus you have to use saw cuts to be able to allow the wood to bend into shape. Then you need to bolt it into place and paint the wood. Once in place you then may have to shave it down in places to get the right recess for the lexan to drop into. What I have just described took 6 hours to do so allow time and be patient. And yes this is not the first one I have done, so take your time and buy lots on wood for when it snaps when you’re trying to get the shape. I used stainless countersunk M4 screws and nylocks to fit it all in place. The screens will be the very last job as I don’t want them damaged by welding or cutting. Plus, with no screens, the access to everything is excellent, with the screen fitted jobs like the dashboard would take twice as long. We also looked at remounting the front wings and bonnet assembly, being as the front used to be a flip front so that you could gain access without removing the front and wings (one piece front, but all in steel). I did not need that and much preferred just taking it off when needed. Some of the door gaps etc were bigger than needed and the way the front wings were kicked out behind the wheels needed sorting. In the end, we cut the lower mounts off and remade them, and moved the front wings back a little to close up the door gaps, making sure the door could still open without catching the wing, which had been a problem before. Wednesday 19th April: We lost a week working on the Cortina on account of racing at Easter’s Festival of Power at Santa Pod Raceway. But now were now back on the Cortina, and as usual it took a while to get back into the swing of things. I still wanted to finish off doing the front wing on the passenger side and moved the wing out a little more to line up with the bodyline better. This actually worked, and with that done, we carried on. Bill finished the fitting of the dash last week, but now the end pieces and the underside returns needed making. Luckily the bead roller and the folder came in very handy for making these small pieces - they are perfect. Again, you start by making it with cardboard and once your happy with that you remake in ally. 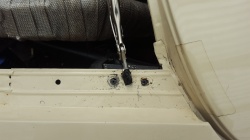
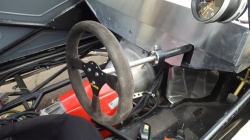
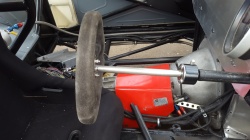
As you can see from the pics, the steering wheel and extension looks real nice and is very practical when it comes to getting in and out of the car. I decided that I would work on the interior and tackle remounting the panel that the launch control, boost control and data ports are mounted to. This, for now, will go back where it used to be; luckily we did not cut those out just in case. With North Weald now just 3 weeks away, the clock is really ticking. The Data Logger panel went back in really nice and using countersunk bolts the floor piece on that side goes right over it and keeps it nice and neatish! I also then refitted the trans tunnel which is original but powder coated. I had already mounted the new shifter on it and made sure the shifter cable fitted, which it did. This highlighted that we still need to fabricate the mounts for the trans tunnel. I also started working out all the cable runs and routes on the passenger side with the floor panels fitted and secured them. The next job was the steering wheel and where all the controls were going to go. I have a line lock, transbrake and bump box button to install. Before the line lock and the transbrake button were on the shifter, I didn’t want that, plus there is a lot of cable running down the driver’s side of the car. I have seen this before, and is usually because American wiring looms are made for LHD cars so the lion’s share of wiring runs down the passenger side – but the Cortina is RHD. I decided to mount the transbrake and bump button on the steering wheel so that I can control the staging process with both hands on the steering wheel; I just prefer it that way. But I mounted them on an ally plate above the wheel itself so that it’s less likely to hit anything when just holding the steering wheel. The line lock I left mounted in the shifter area. I then spent time picking out the wiring I needed out of the loom and added curly cables so that when I remove the steering wheel to exit the car, there is enough slack on the cable to move the wheel. The last job was remove the steering rack, which was when Bill and I checked the steering and brakes. Bill noticed play in the rack, a quick call to Jon Hollingworth confirmed it had been on the car all the time he owned it, so it was probably due some TLC. Meanwhile, Bill was busy fabricating a front screen support, this stops the screen from flexing and buckling at speed. Again it’s a fairly small piece but it’s a time consuming fabrication. Naturally we used the lightest, thinnest tubing we could find and designed it as a double triangle to give it strength. The last job of the day for me was to reconnect everything back up electronically and fire her up and put her through a heat cycle. It had been at least a month since she had been started and a lot of work had been done. Everything was reconnected and there was enough charge in the battery so we pre oiled her from the Accusump, switched on the ignition and she fired up straight away no problem whatsoever. That was real nice, I can tell you, and it warmed up quicker due to the warmer weather and there were no leaks from anything. A very nice reassuring way to finish the day. Sunday 23rd April: Just to keep it rolling along, I reassembled and refitted the powder coated rear wing today and re attached it to the boot. Again a time consuming fiddly job done! Thursday 27th April: This was the first day back on the Cortina proper, due to the Festival of Power and Paul Marston’s Drag Race School teaching at Santa Pod Raceway which went very successfully. Other than the Monza being on alcohol in cold weather, they do have a tendency to spit back when starting from cold. It did so and broke two ring gear teeth clean off whilst teaching so that had to be fixed as well. Not trying to make excuses but there are only so many hours in a day! Okay, I’m on my own today, elephant in the room time, its dashboard day. First off, I had to finish the assembly of the dash as the driver’s side pieces were made but not fitted. Then I needed to get the dash cut with holes for all the gauges so that it can go with the other small parts that still need colour. It was a time consuming and delicate job, and if I make a mistake and ruin it, a lot of work goes down the toilet. So I measured it twice or three times, was patient and got it done. I sat myself in the Cortina a good few times to make sure I knew where to put them. It was either off to one side or directly in front. Now I had the steering wheel and column in place, I could easily see the gauges when they were in front, and my hands on the steering wheel still don’t obscure the gauges so that’s where they went. I did speak to Bill and he suggested that the bottom of the dash looked unfinished and said that rolling the bottom edge under the picture frame tubing around the transmission would make it look finished. I could see what he meant, so I figured let’s have a go. The trick with metal is to avoid stretching it too much and so as to get the fold I wanted, I went over it three times, folding it a little more each time so that it was not stretched in a direction I didn’t want. I hope that makes sense. Once I had done that, it really made a difference to the look of it and at last I could see it working. Then with lots of measuring and checking, I cut the holes and checked they were the right size, they were - just. It’s always useful to have a gallon of panel wipe to take off the marker lines so as to have a clean surface for powder coating. When all that was finished, I decided to tackle prepping all the other colouring parts, accelerator and brake pedals plus some more covers and pieces etc. With that all done, it was time to work out the button layout, as it needed sorting out. As the steering wheel was now removable, it was final decision time. Any buttons mounted on the steering wheel had to have curly cables with stretchability built in. I decided to go ahead and mount both the transbrake button and the bump box button for staging with the turbos spooled up on the steering wheel. I mounted the line lock on the shifter, as that keeps the wheel a little less cluttered. This meant extending and reducing some wiring, so I cut out anything with a join in it and installed it fresh. I also avoided using spade connectors and preferred soldering and then heat shrinking insulation on all joints to ensure good contact. Again it was a time consuming job, but you only want to do this once. I also had to tidy up and re-run some of the cable paths as there is a lot of cabling on the passenger side, so the tidier you can get it the better for the driver. After this it was simply a case of running all the powder coated pieces down to the powder coaters. Tuesday 2nd May: With the deadline date fast approaching, Bill and I agreed that, weather permitting, the Cortina would make the opening event at North Weald. It’s next Sunday and there’s still a shedload to do. Still no windows in her, no wheels on her, no braking system to speak of, no steering rack, the list goes on and on. Will we make it? Well it’s still the same as it’s ever been, it just needs hours of work put into it, lots of hours. To help this along and give it our best shot, I decided to take the rest of the week off from work. As long as Bill gets his bits done, I figure I will try to get everything else sorted and will need plenty of time to do it. This has been a six month project, so I will do my best to make it happen. I collected all the powder coating, bought it back and installed the gauges, so now its’ starting to take shape. The powder coating really made a difference, it now looks the part. The first job was paint and laquer the roof panel; Bill and I had spent hours on this and trying to work out what to do with it. Gary Springford at DRE came up with a great idea, but there is not yet the time to do it. So, for now, it’s painted as is and will be fitted. The next job was reinstall the parachute lever and chute cable, running it through the boot. The cabling in the boot also needed tidying and the wiring for the water injection had to be reconnected. Luckily the pictures I took when we stripped it all out was a godsend as it gave me a visual record of what went where. Next I needed to fabricate a piece of bar to secure the battery to comply with MSA safety rules. I used a piece of bar from the Cortina’s removed parts bin to recycle it. Gary Springford did a great job with the steering rack, it was actually internally adjustable on the ball and socket joints and just needed a little play adjusting out. Once that was done it was like brand new, I just had to detail it, clean up the mounts etc and reinstall it. On the front, last job was to align all the bonnet pins and make sure that all six were right and held the bonnet nice and snug, also the boot needed the same work, this was quite time consuming but needs to be right. All that took ten hours. Wednesday 3rd May: Today was purely on the dashboard. I wanted to take my time as there was a lot or wiring to pick out from the old dash and understand, some of which was now redundant. Like the high beam, indicators, etc, but the ignition light and the oil lights were still needed, so I had to ensure I knew what everything did before I removed the loom from the old dash and the clocks. So the long process of marking everything as you removed it started. You also have to ensure you know what is earthing through what, so it all works once you have removed it. There were also the two quick releases for the turbo boost gauge and the oil pressure pipes. Removal and marking took about two hours or so. I had spent about an hour previously working out where I could place everything on the new dash so that it was within easy view when sitting in the car. Everyone has their own ideas about this, mine were, I wanted a much bigger low oil pressure light in my eyeline and I still wanted the shift light on the dash, despite the new to install rev counter having its own shift light capacity. This thing accelerates so fast, I figured two shift lights might be worth trying, as it means you can set one a little lower rpm wise so you have a chance of catching it, especially in first gear. 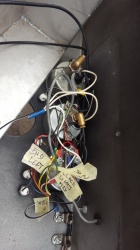
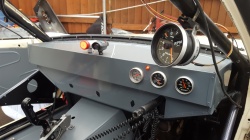
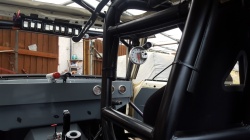
Then came the job of reinstalling everything into the new dash, the three gauges, the ignition light, the mount for the quick release pipes and the oil and shift light pods. All in all about five hours, but I am pleased to say for once it all worked first time. Also it looked real good. I also replaced the rev counter and moved it further up the cage, this helped with the removal and reinstall of the dash and it’s easier for the driver to see it. I did however need to go online and download the wiring diagrams for both rev counters, as the wires were different colours. Autometer’s website is very useful for that. I fired the motor up a couple of times to make sure everything worked, the last time to make sure the rev counter worked which thankfully it did, having previously lived in Gary Springford’s Hulk Shogun. Lastly I reinstalled the last of the coloured panels that I had collected from the powder coaters with the customary black rivets. Thursday 4th May: Bill is in today, it’s the only day he could spare away from Comanche Racecars and we both knew this would be make or break day. I had earlier that morning picked up the four corner scales from Gary at DRE, the plan being that once we finish for the day then we scale it, well that was the plan anyway! Bill had two major jobs to do today and lots of small ones. The first one we tackled was to fit the roof panel. Bill was really happy with how the dashboard looked and that I had got plenty done. Once fitted, it moved one step closer to being a useable car. We removed the bonnet and one piece front for better access to the brakes etc. Bill and I had to tackle the fitting of the transmission tunnel and the remaining removable floor piece that the tunnel was attached to. Once we agreed how it was going to go in and where it attached, Bill got cracking on that. I decided that tackling the windows kept me out of Bill’s way best, so I started on the rear quarters. Like most of these jobs, although I had got the windows to where I thought they were ready to fit, there was still a lot of fine tuning to get the perfect fit. Also Bill finally won the argument and I blacked out all the window frame area. I wanted to keep as much of the bodycolour as possible but Bill said that it would look horrible. After relenting and painting I must admit he was right! I used a real nice soft brush and didn’t spray it, there are simply too many painted surfaces to spray now and the brush finish looks real nice. 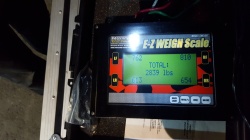
Using a soft pad on a 4 inch grinder I shaved it down the edges carefully and eased the window in. There is a contour for the rear quarter window, it doesn’t sit flat so as you bend it a little. It inevitably changes shape, which you have to allow for. So I riveted it direct to the frame in one corner, then worked out rivet spacing (very important) and worked my way along until the window was fully fitted. I used a compressed air blower to keep as little swarf trapped in between the window and frame as possible. Then I tackled the rear window, which on a Mk5 Cortina is a real tricky piece to do. There is a really tight radius in each corner at the bottom and a rising radius. I guess this is just one of those jobs that by accident I am good at, as Bill reckoned I was a lot more patient than he could be with it. I used big black rivets to spread the load on the increasingly tight corner angles which worked a treat. I was genuinely concerned it might crack but it didn’t. This back window took a lot of time and patience and I created a lot of mess easing it in and shaving it down. It’s by no means perfect, like most things you can always pick fault, but I am very happy with it. The back screen took the time to 5.00pm. Meanwhile Bill had fitted the interior transmission tunnel and the driver’s side powder coated floor piece. Bill and I also went back and forth on the window net fitting and finally decided on how it would fit. It needed to allow a small gap for the driver to be able to open the door from the inside and still fit to comply with MSA standards; we did manage to achieve this but we also had to ensure that it did not interfere with the driver so had to be quite taut. We eventually got there. We stopped for a bite to eat so as Bill didn’t fall down, you have to keep him fed! Then, with the flood lights on, we tackled the brakes. It soon became apparent that the brake bias was not going on tonight, whether we need it or not. It has American pipe fittings which, despite tipping out all the brake pipe fittings boxes at Local Motor Factors Kenlees in Romford, I could not match, so instead I bought all the fittings we needed to connect up the pipes to the brake master cylinder on the Cortina, which at 7.00pm at night ain’t bad going. Once I returned, Bill and I got to plumbing in the brakes. Once that was done, we could not bleed the brakes through and get a brake pedal that would stop it. This took a while as there are six bleeds to go through. The brake was there, but not perfect, but it was enough to move on though. So on with the wheels, this is where I realised there was no useable trolley jack (The Allyjack had finally said no) so I stole the one under the PT Bruiser. It was small but works, then with only 10 wheel nuts that fitted, it was a case of getting the wheels on as best we could, as it was now clearly dark. The Cortina had lived on axle stands for nearly six months now, but neither of us were going to give up. If we didn’t get this done and weighed, Bill would not be able to redraw the Cortina out and put a chassis tune into it for its new weight. Prior to fitting the wheels, I got underneath and tidied up and refitted all the cabling that had been disturbed during the build. Slowly, we fought it and got the wheels on and pumped the tyres up to the correct pressures for the track, did the usual dance for the rears where you have to let all the pressure out and squash the tyre to get it back in the arch then re-inflate it. Then we got it on the ground. It had been a while since it was on all four paws. We refitted the front and the bonnet, refilled with fuel, put in the seat and harness and fitted the front screen with four screws so as everything it as it should be. We put the parachute assembly on the rear wing and we were ready to roll her out and scale it. Luckily, none of the brakes were binding and we pushed her out into the road and got the scales out, powered them up and placed the Cortina on the scales. Without driver, she weighs 2838lbs which means that we did achieve our target of removing virtually dead on 400lbs, that’s with the Cortina still on gasoline so massive front radiator and all the water to air charge cooler and the charge cooler radiators, pumps and fans etc. You always want to think you would get more, but 400lbs is fine by me it was at the very top of my realistic expectations, fantastic result. The corner weights need verifying as we did it quick and the road was cambered but the weight loss is genuine, oh and we finished at 11.00pm, so that was a 15 hour day for both of us!! Friday 5th May: After a very lengthy tidy up from the night before and a cleaning of the Cortina, I got straight back on the front screen fitting. This one needed a painted edge, so I masked and painted that, there were still a lot of small jobs to do. I fitted the driver’s seat properly, only to find the one I had kept nice and clean would not fit and the one that had lived in the car during the build would have to be used so I spent half an hour cleaning it up! I then fitted it and the belts. The ignition inhibitor also needed incorporating properly to the new shifter and the line lock button had to be attached. 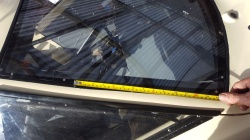
With the border paint on the screen dry, I then went through the same process fitting this; unfortunately the stainless bolts I had were too short. So it was off to Firstline Fastners to find something fast! Eventually I found a suitable replacement that worked out perfect and spent the next three hours massaging the front screen till I was happy; I must say it looked real nice. Then I happened to test the brakes as Bill had suggested to see if they were okay; the brake pedal did not return and stayed down. That was not good as it was now Friday afternoon. I figured the master cylinder had jammed so I rang Gary at DRE who agreed and said bring it over in the morning and I will sort it for you. Meanwhile I made up the parachute mount and attached the new chute bag to the framing and refitted it. Then it was just odds and ends, tidying cable runs on the passengers side, another clean up and setting the rear wing support struts. Don’t sound much but took another ten hours. Saturday 6th May: 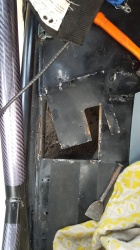
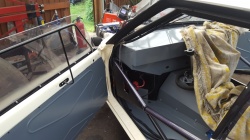
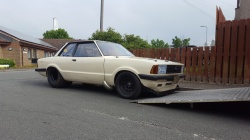
I was at it 7.00am again, to remove the master cylinder which came off nicely, only to discover I had to cut out part of the floor that was spot welded in to get it out. So dealt with that and off to DRE. Gary Springford is one of those guys who can fix just about anything and within a hour had it working better than new, thanks mate. Joe, one of our PMR crew, stopped by to help, I refitted the master cylinder and bled the brakes. Joe then sorted the remaining wheel nuts for me and helped pack the chute, while I charged the battery for the final time and sorted out the race fuel, race tools, gennie, race suit, funny car over boots and gloves. I gave the Cortina one last clean, checked all the fluid levels and set the tyre pressures. I then got the trailer, loaded the Cortina into the trailer and were ready for North Weald. I can honestly say I was kind of shocked that we had actually made it and had a race car that was finished enough to take. Considering all we had been through, to have it done on time was quite something. 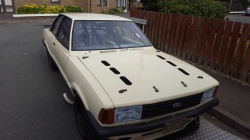
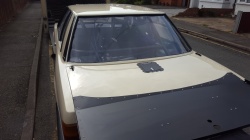
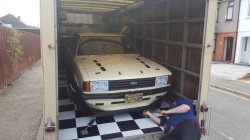
Sunday 7th May: North Weald is a ex WW2 airfield and Tony Huck and Maitland Racing run a Test n’ Tune, this being the first event of the year. It’s always very busy, so we were up at 5.00am and on the road by 5.30am to pick up the rig and head over. Arriving there to join the queue at 6.45am, the gates opened about 7.20am so by the time we got in and pitted up it was around 8.00am. You have to go early to guarantee a run ticket, then sign on. The plan for today was quite simple really, a soft run to ensure it steers and brakes okay. A full check of the Cortina, then another pass, more of the same and lastly, if all works perfectly, a run with grip juice burnout and a proper launch with trans brake and bump box staging. Before any of this, however, I needed to do the valve lash as we simply did not have time prior, remember we had barely made it this far. So me and the Crew Chief, Funsize, Aaron Springford, and Joe, along with Bill and Luke from Comanche watched me check the lash and anything else we could think of. To be fair there was not much to check, Bill and I were now so familiar with her it was no real drama, just the lash, which was perfect, no broken springs etc. By now the track had opened, the day had started a little cold with some misty rain in the air but it was PACKED SOLID. So we prepared for the first pass, before that I had an amusing time with the Crew Chief as she tried to put the funny car gloves on me and the HANS device. Once we had worked that out, we were good to go. So I drove the Cortina round to the startline, the steering was okay with the small steering wheel, as long as you were moving, and the vision out was excellent. Once we got there I got out and the crew asked when we could run. I had already put on the funny car overboots, but once you’re wearing them you can’t walk far as there is no sole, they are not for walking about in, just for protecting you from fire. Then the Crew Chief dressed me, gloves first then HANS and helmet which goes on from the back. Then it’s into the car, never easy to do with a crash helmet on but it’s the only way. Again, the crew strap you in, as by now with the five layer gloves you would never do it. Now you’re ready. I can tell you it takes some getting used to, wearing overboots on your feet and big thick gloves and then you have to drive, but even at North Weald if we had a fuel line fail, you will burn just the same, so getting used to this stuff is just as important as the car working properly. I got the signal so fired up, no problem, pulled round, selected the right gear (2nd for a burnout) got spotted in the water and did a small burnout. Up to the line, checked all the gauges, put the pre stage and stage lights on and drove down the track using all three gears and came back - no major drama at all. Straight back to the pit space, got out of the gear and turned the Cortina round for the next pass, refuelled and let the heat cycle go through; turbo motors get hot fast. But no leaks, no dramas, no steering or braking issues, although the line lock/brakes will need looking at as the line lock was not holding. 
About 12.00 we went out for our second pass, and repeated the same process, suited up. I was helped to get in the Cortina so that I didn’t clatter the crash helmet, etc. The motor fired up fine, I went up to the water, did a bigger burnout, took it up to the line, did a footbrake launch and went through all three gears again. I then drove back to the pits again through the packed crowd with no dramas. This time we took the bonnet off and just went over her to do a visual check that nothing was wrong, leaking or had fell off. All was good, I put the battery on charge and waited until after lunch for out third pass. So far all the boxes were ticked, so for the last pass I decided to go for a start line grip juice burnout and launch off of the transbrake, using the bump box to stage. So we ran just after lunch and by now I was more comfortable wearing the funny car overboots and the five layer gloves. So round we went, into the juice and started the burnout, I went further out than I wanted on the rolling burnout but it’s all a learning curve. Got into prestage hit the transbrake, built up a little manifold boost pressure then bumped her in. As you would expect there was not a lot of grip but it was not that bad, I made the pass, got all three gears and feathered it. We ran a 12.1 at 100+MPH. I got back and we were done for the day. The Cortina had done everything we asked it to do, so now we were ready for Santa Pod. Just waiting on the chrome moly we ordered from Chris Isaacs for the wheelie bar to come in, once fabricated, we are ready to go to Classic Ford at Santa Pod and their Face Off Heads Up Competition. Wednesday 17th May 2017 Tuesday 7th March: Before I go into what got done today, I must mention this, as it's important for anyone building a car who is grinding and cutting. One bit of very practical advice. Whenever you cut, grind or work on anything that creates small metal filings, as soon as possible, clean them off, as they will eat into any surface you leave them on. Painted or not, they eat in and ruin stuff quicker than you could imagine, so unless you want to make more work for yourself, make sure you do this. Right - on to the progress today. Bill today was on the front brakes; we needed to make brackets for the calipers so as they were a perfect fit for the discs geometry-wise. The original brakes were overkill for the thinner front tyres and wheels. The easiest way to do this is to make the brackets out of cardboard and then transfer the design into metal. We used T6 Aluminium plate ¼” thick for strength and lightness. A recess also had to be cut into the bracket to mount the caliper how we needed it. Although it looked like it would line up perfectly, you always seem to need engineers' washers to get it exact. It looks right but never is, just like you always need bits of wood to load a car in a trailer. It did take quite a while to fabricate the brackets and then line up the calipers and clock it all in so that it was right. It's another real small job that’s very time consuming; if you don’t have patience, find someone who has - this job took nearly all day. Other than that, Bill finished the steering with a small bracket that he also fabricated from T6 Aluminium plate to guide the steering shaft; once fitted the steering is now virtually finished. 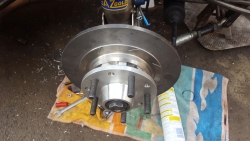
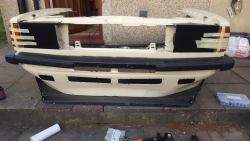
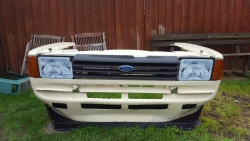
Meanwhile I wanted to stay out of Bill's way, so I worked around him. I did get one job done that was long overdue. I wanted to connect everything back up and fire up the motor and do a full systems check and put her through a heat cycle. This was again to ensure that we had not broken anything or cut any wiring. So I reconnected all the wiring loom to the FAST ECU, whenever you weld its always good practice to disconnect anything that has sophisticated electronics in it, just to be on the safe side. The manufacturers always say its okay but... So Bill and I did our usual checks for fuel leaks once the system had been reconnected, battery fitted, etc. The motor fired up perfectly and ran for a minute or so, then we shut her off and I filled the tank, initially I always just put half a gallon in just in case it all has to be taken out again. So once it was topped up, I fired it up again, all good, no issues and so ran through a heat cycle and then shut her off. Then I was on the front again, fabricating the small thin ally pieces, putting a bead in them, painting and fitting in the front panel. The front of the Cortina is designed for road use and as such it has a lot of vent holes as it needs cooling for constant use. But with a top speed that will eventually be approaching, maybe exceeding, 200mph, the aero becomes a more important feature. So with all the openings at the front, numbering about 12 without the grille, it was time to fill some. All the openings make the front of the car dirty from an aero point of view, the cleaner I make it by filling in the openings the more downforce I create. I have to be mindful that downforce at the front makes the back lighter, so its kind of a balancing act. I filled in just the lower four vents nearest the front splitter to make it more effective. Once we start running the Cortina at Santa Pod at speed we can then see how it handles and go from there. I should be able to feel if it's loose at the back which would mean we probably need more rear wing! I also fitted the Headlamp fittings and the headlamp decals along with the front indicators, which really made it come alive. Before Bill and I finished, we tackled the dash design, which, after four different ideas, led to a decision being made. Tuesday 14th March: One of the brake hubs was giving us some trouble as it was going on fine but when you added the brake disc, there was a wobble. This is the first time we have had this kind of problem and in this case cannot be ignored. If left it would cause the pedal to bounce up and down upon hard braking and affect the efficiency as well. At first I called Chris Isaacs who confirmed that I had the last pair of hubs, which I already knew, Chris quite rightly suggested that I need to check that the outer bearing races were in right and not being held by a burr of aluminium left when I pressed them in. So I took it to Charlie at CTM Performance and Machine to get the hub checked for this, and also check if the machining was off when it was made. It came back with the bearing seats being okay at the front but a question mark on the rear one, so I will keep you posted on that one. As you can imagine this has taken up a fair amount of time, these things happen. I also travelled down to my metal folders again down in Rainham and got them to fold the dash panel as Bill and I had agreed, as usual they did this while I waited which was very kind of them. Tuesday 21st March: Bill and I back on the Cortina for a full day, starting with the front brakes, to ensure I had not numptied myself and then moving on. Bill tackled the dash fitting, this was the first time Bill had seen it and was happy with the result. We removed both doors to gain easy access, which is pretty straight forward. Bills first job was to cut the dash down to a more manageable size so that we could actually get it near the car. You always have to make these things too big, but you need to also make sure you don’t cut it down too small. These small details make a lot of sense when you are actually doing it yourself! Bill also had to fabricate the landing panel which is what the dash sits on when it's in the Cortina around the windscreen. The dash will fasten with butterfly Dzus’s as they are the only ones that will work easy in a confined space. With the rake of the screen, a Dzus driver would be a pain. 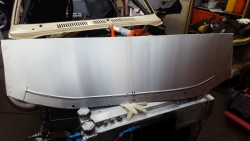
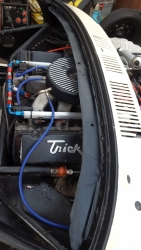
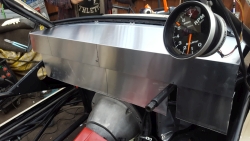
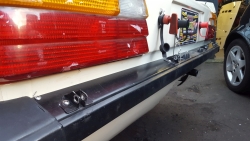
Whilst Bill was on that, I worked out how to attach the front bumper and the quarter bumpers back on the one piece front. I wanted it as flush fitting as I could, to aid the aerodynamics, it needed to be secure too, so I bolted it in place as neatly as possible for strength. Once this was done I then did the same to the rear bumper. This really had to be secure as the rear wing strut supports mount on it so there is a fair loading on it at speed. I managed to get it quite flush again and bolt it, so I was pretty happy with that. It's more and more of the small jobs now that need doing. Bill had got the dash down to a size now that actually fitted inside the Cortina, so now it was thinking and working out how to fix it in. This involved a lot of discussion and looking at the options, you don’t want to screw this up and have to start again. So after the wrangling Bill and I went over the options and agreed on the shape, size and what it mounted to. A real plus was that PMR car chief Sefton Whitlock had made a superb job of the removable steering column extension. With this fitted and the dash in place, the drivers position was working out real well, you can see over the steering wheel easily to view the gauges and the dash is not too high to obstruct the drivers view. All these things are important to get right, you only get this opportunity to get it right once. Sunday 26th March: Small job day today so the new volt meter was fitted in the back panel. I always like to have a way of telling what charge the battery is taking and also a way of checking that the alternator is charging correctly. I also refitted the front end and started re-attaching the bonnet pin posts etc. Tuesday 28th March: Bill and I worked on the Cortina all day today; Bill fitted the fuel flap which I had powdercoated earlier. It’s a real nice piece that Corky Markwart does at ART in Clearwater, Florida. It’s a bit fiddly and has 100% more fasteners than it needs but as I said it’s a nice piece!! Bill and I also finished installing the new powdercoated grey boot floor panels which up till now had just been placed in. Again we used black rivets to keep the black thyme goin. Also the Fuel pump was final fixed and the Panel around the pump was cut in half and fitted to make access easier. All the panels went in real nice, it really helped having an assorted box of black rivets as they were very handy. The water injection tank needed a home and the pump for the water/methanol injection also needed refitting. The pump went back basically where it was before but instead of being fitted to a nasty piece of leftover inner panel it went straight onto the single skin rear wing. With the bracketing fabricated in ally and the bolts hidden behind the rear quarter bumper it’s a real neat job with only one braided hose having to be made to connect it up. The tank was mounted next to the fuel cell, we were trying to centre as many parts and pieces inside the chassis rails for weight distribution, but the pump needed to be lower that the tank so it gravity fed it. Then we made up another braided hose to remount the catch can for the fuel cell. The catch can is underneath the boot floor for safety and positioned so as not be in the way when we eventually design and fit a rear diffuser. Lastly, the problematical front brake hub was mounted and clocked in to ensure that everything was now happy, so the whole front brake assembly can now be fitted finally. 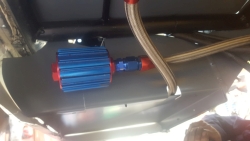
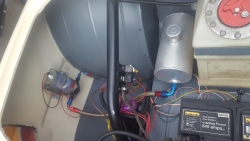
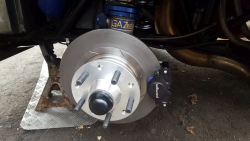
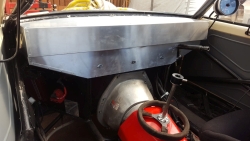
Sunday 2nd April: It was time to final fit the time-consuming front brake assembly. This involved removing the disc from the hub, removing the bearings, cleaning out all the grease. Fitting the wheel studs and locking them in place. Stud locking the bolts, fitting the locking tabs to ensure that the brake discs cannot get loose on the hubs. Then applying the Red Line Oils super slippery ultra temp grease to the bearings, refitting the rear oil seal and refitting to the stub axles, making sure that the bearings are preloaded just right. Then clocking in the front brake caliper assembly and making sure nothing binds up and that, once fully assembled, the brake disc rotates nicely. Once that’s done, fit the wheel and bolt it up. with the powdercoated wheelnuts. Inflate tyre and see what it looks like, then repeat complete process on the other side!! It doesn't sound much but it took us all afternoon to do; this was a time consuming job but it must be right. Tuesday 4th April 2017 Tuesday 14th February: Both Bill and I worked on the Cortina today, it kinda seems like we are near the end of fabrication and should be able to start the final assembly soon. With only seven weeks until the MSA Sportsman Drag Racing National Championship season starts (Easter at Santa Pod), time never stands still. As previously mentioned, the Cortina is not meant for any of the National Event Classes, its more a Top Sportsman, No Prep, Grudge car. But PMR do compete in the National series, so free time will diminish, the closer we get to the racing season. There is still plenty to do; today Bill replaced and fabricated a floor piece which the tunnel attaches to, saving 3 lb. On the passenger's side we made the floor removable. On the driver's side you can't do that, it's in the rules the floor has to be steel and solid. After Bill finished that, we then spent quite a bit of time with me sat in the Cortina so as we could work out where the steering/steering column needed to go. This is one of those jobs where a little driver experience is useful. You want the steering wheel where its comfortable and where it makes ergonomic sense. By this I mean that it doesn’t hit your knees and is easy to use, taking into account the fact that you are strapped in with a five point harness and there is a funny car cage around you and a window net. As a driver, you are working in quite a confined space and as such anything that can make your life easier, now is the time to include it. Personally I don’t like the steering wheel too high, this is because with your hands on it, you cannot see the gauges easy as the view is blocked. I also use a smaller steering wheel, again to save space. I like the steering wheel so it's quite close and you don’t have to stretch to reach it. With European cars, this is not easy as the cars are quite small inside, especially one from the 1980’s. To make my life easier, I will have around 10” of the steering shaft removable using the quick release so as the steering wheel and the first 10” of shaft come off as one. I can get in and out of the Cortina much easier with that removed. Over the years, I have driven a lot of different cars, so each time you see a good idea, you remember it and each time you drive a really badly laid out car you try to improve it or remember to avoid making the same mistake. I was always impressed with how Jon Webster built my PT Bruiser, I wanted the car to be built by Jon, who was at the time working for Hauser Racecars. Because he has built so many, Jon incorporates all his learned experience into each new build. Jon may not be cheap pro rata, but you always get a quality well laid out Racecar. It's worth checking out his build thread on his new Pro Mod Mustang. Going back to the Cortina, we worked out what was my ideal steering position and it looks like there is a very good chance that it maybe achieveable. This very rarely happens, especially with a turbo car as under the hood is very busy, but Bill is reasonably confident we can get close, so after bush fabrication and shaft assembled we can then install and make sure the angles all work to get to the rack. Moving on, Bill decided to remove the doors, which was a very simple affair on the Cortina, once removed I could feel that there still was a little more weight in the door that I thought there would be, the strength I had left around the hinge area was not needed so it got removed. Bill then finished off the welding on the window frames and I disc’d the welds to smooth them down. The weight removal most probably took a couple of pounds out of each door, it sure made a difference when I was carrying them about. I then masked and painted the frames, again in black satin then laquered to protect the paint. 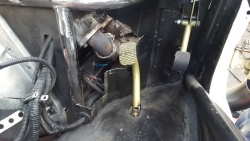
The pedal box area also got tackled, having big feet (size 12) plus wearing the funnycar boots, I wanted as much room as I could get, Bill and I both knew that there was space to be gained. Once that was exploited then the brake pedal could be moved over to the left. It currently was angled right a little, which made the pedals closer than they needed to be. With the extra space gained by rounding off the right angles in the pedal box area metalwork. This gave us all the space we needed, your only talking a couple of inches but this allowed us to move the brake pedal over, plus by rotating the angle of the brake pedal contact pad it made it a perfect fit for me. Added to that I can now see the pedals a lot easier as Bill and I raised the steering shaft from below and in the pedal box area to above the picture frame tubing which again helps. Anything that means the driver can do something without thinking is a real plus, especially in the braking department. We also checked the pedal ratio which is 7-1, perfect, just what I expected from Jon Sleath Racecars. The hydraulic handbrake was also removed which again makes the drivers compartment a little more roomy. Lastly the underside of the Bonnet was put into paint and laquered for protection, which made it look 100% better cosmetically. Wednesday 15th February: I took a trip over to see UK Top Sportsman competitor Dave Gadney. Dave has been selling off some parts recently, so I took a trip over to Sutton, Surrey. I bought the steering wheel and shaft assembly, just in case it was useful along with other parts and pieces. I also got to collect all the powder coated interior parts from the proprietor of KK Chrome in Romford, Mick, all of which looks real nice and adds such a professional finish to a Racecar, along with making them a lot more practical from a housekeeping point of view. There are more parts to take over there but we have to make them first. If you need any powder coating doing you need to talk to Mick, the service is great and he is not expensive. The parts pile to put back on the Cortina is growing! Friday 17th February: The last paint job to be done, the only part of the interior that could not be removed for powder coating was the rear wheel tubs. Having made a couple of sets of tubs before for the Monza and fitted them, it’s a long delicate job, plus you glue them in with sicaflex, so the chances of removing them without damaging them is very small. Now I have the interior panels back from the powder coaters, I can get some paint matched to the powdercoating. I got that done and grey primer filler, satin paint and satin laquer. So I started off with just sanding a key into the tubs with some Scotchbrite. Then once that’s done, removing the remaining rivets and ensuring there is nothing on them that I didn’t want. Lastly, it's time to mask up the Cortina, it’s a time consuming job and you need plenty of newspaper and masking tape. You kinda have to use common sense to work out what needs masking up as, when you spray, you have to work out where the overspray will land and cover it up. You don’t want to spend as much time repairing mistakes as you do painting and masking up in the first place. With the roof and the cage and the floor already in paint, this is the last paint job. So this is the one where you have to be the most careful. It took about four hours to mask it all up and then its time to paint, I used cellulose primer filler and cellulose paint, this is what the paintshop recommended so that’s what I used. Following on with laquer in a matt finish. Not an easy job, but I was determined not to cock it up and ruin what had already been done, so I took my time. I was happy with the end result and as it was a warm day the paint went on real nice. I had to wait till Saturday to pull the masking off as I was loosing the light and wanted to make sure I had not missed anything before demasking the Cortina. I checked it on Saturday, nothing had been missed, so off it all came. 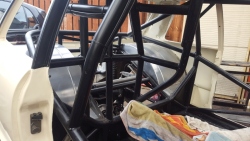
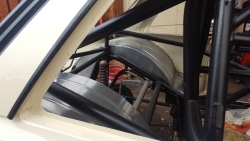
Sunday 19th February: With all the parts I had now collected for the steering shaft assembly, today was the day for Bill from Comanche Racecars, my partner in crime on this build, and me to tackle the steering fabrication and assembly. Previously, on Wednesday, Bill and I had worked out how much tubing we needed for the steering shaft and the tubing it fits in. It soon became apparent why the original steering dived down and had a more vertical angle to it. With all the header tubing for the turbos so high up and compact, there was not much room to run the steering. With the use of the industry standard ¾” chromoly steering shaft size and the real small uj’s, Bill figured there was a good possibility that we could pick a route through the headers. So Bill brought back with him the nylon bushes that he had machined for the steering shaft housing and this was our starting point. Now it was a case of me sitting in the Cortina as I would when driving, with the correct position of body and good access to the throttle and newly modified brake pedal, etc. Bill tacked the steering shaft housing in place temporarily whilst I held it where it was comfortable. This needed to be done before we could work out if and where the steering shaft would then disappear through the stainless headers to attempt to reach the steering rack. On the first attempt, it looked like the steering wheel would have to be a little to the right of the driver, not much just a little but with a funny car cage around you it meant that your right wrist was a little over centre when moving the steering wheel. Also the angle could be better for the first uj. So Bill cut it all off and we tried again. 
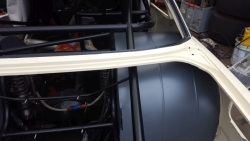
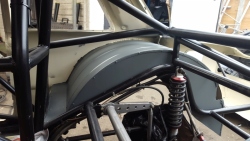
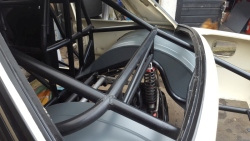
This time to help my right hand wrist, I set the steering wheel about three inches higher; by doing this, it meant it helped the angle at the other end to get through the headers and meant the wheel was dead straight. This gave me a lot better dexterity with the wheel, although Bill had to remake all the mounts as they needed to be longer. This meant that the angles for the uj’s worked out better and we could hit the rack. Once this was done, we had to make sure that you could still get the rocker cover off without having to remove the steering shaft – yep, that was no problem. So Bill spent the rest of the day fabricating all the shaft lengths and fitting the uj’s properly and the final uj to go on the steering rack. Bill also used the quick release and a uj joint to hold the steering shaft in position with the bushes, which will be glued in upon final fit. So in total we had to use three uj’s, this gives is a perfect steering wheel position for the driver. We will also have PMR crew member Sefton Whitlock make up the steering extension which will be 9 ½ inches long. This will make entering and exiting the Cortina really easy, without this it would be a mission. Whilst Bill was on the steering I finished off prepping and painting the inside of the front bodywork in the steering/dash/pedal box area. I had put a very quick coat of paint on it to prevent the bare metal from rusting but it had to be done properly. It was masked up and then painted. Along with this, I went over all the other paintwork and touched in all the bits that were marked with 'in' and 'out', plus all the little bits of overspray. I also had to repaint part of the boot area as it just needed a tidy before all the panels were reinstalled. Then I painted all the new steering column and bracketry and finally cleaned up all the dusty areas looking for more areas to touch in and to prepare the Cortina for what would be the final fit of the interior and boot panels. 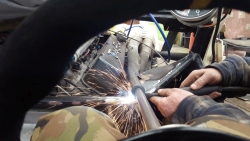
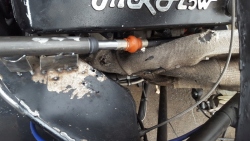
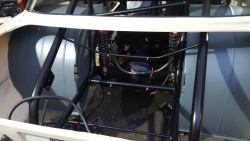
Tuesday 21st February: I decided to get a real full day on the Cortina today, so an 8.00am start. Today I just want to give her a good clean, finish any small paint repairs and prep ready for the reinstallation of the powdercoated panels. There are simply too many parts lying around that need to be reassembled. I did want to wait until all the fabricating was done but I can’t wait till then, I need some space back! The first job was to reassemble the doors, so I re-hung them and gave the inside of the door a final clean then fitted the powder coated ally door panel. I had all the grey interior panels finished in satin as a contrast and to keep the understated theme going. Another nice touch that Bill suggested was to use black rivets instead of the usual ally finish on the interior panels. They are easy to find on Ebay. Once the doors panels were fitted, then it was the ally strip that holds the lexan in place, lastly the lexan itself. It was just as well all this had been pre-fitted before, as it was a mission to get it all back together and lined up properly. Once one was done, it was a repeat process for the other door. Bill's idea of riveting the lexan straight to the tubing worked really well and using black rivets meant they blended in perfectly. I then started in the boot floor area with the battery tray also needing to be reinstalled. Then I remounted the fuel tank and the fuel pump. After a little headscratching, I worked out where everything went and only had to look back at pictures once! The Cortina has not been started for a few weeks now so I am keen to get all of this back together again so I can run a systems check and put her through a heat cycle. So I also ran all the fuel lines and connected it all up. The interior panels were next, I reinstalled the largest floor panel between the tubs, this bolts in. I then went on to the one piece front, I prepped it and then gave the inside a coat of laquer to seal it and hopefully keep it cleaner. I also removed the dzus fasteners that secure the base of the wings, as they are partially obscured by the cow horns and are real tricky to reach. I replaced them with four powdercoated black (naturally) dzus’s with the butterfly tabs built in, so you can undo and do them up by hand, well that’s the plan anyway. Then I refitted the front splitter assembly that was painted and it now powdercoated. I also refitted the bonnet catches and the boot catches with the original ones that have now been, yep you guessed it, powder coated black. All time consuming but needed to be done, still plenty to finish off but certainly made a dent in it. 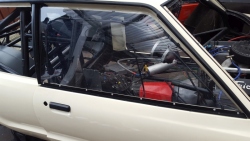
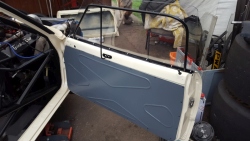
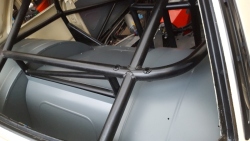
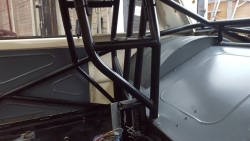
Monday 28th February: It was the first time Bill had seen the doors in one piece finished; he was impressed with the look and finish. Sometimes, it’s the little detailed parts coming together that give you more enthusiasm with the project. Bill had machined the rest of the parts for the steering column bushes and welded up the steering column quick release, etc. So that was all assembled and then finally fitted. Once that was done, then I removed the other wheel assembly on the passenger's side front and put the front of the car on axle stands so that we could run the steering rack freely from lock to lock. As Bill suspected, a support will be needed just as a guide, other than that, once the nylon bushes were glued in, the steering was done. Next Bill fabricated a panel for the driver's footwell position. After a lot of discussion, we decided that being able to remove the panel as a whole was favoured. Previously, there was a small access panel to remove the starter motor. By having the whole panel removable, it made that job a whole lot easier. As usual, Bill made a real nice job of an awkward to fabricate piece, first making it in card then in metal and putting some nice beads in it for looks and strength. I was firstly on a couple of small panel pieces that missed the powdercoaters. Prior to paint, Bill wanted to detail them a little, so we ran beads into both pieces. The paint mixed up for me was the exact same colour as the powdercoating, this meant that in the future repairing the inevitable dings and scratches would be a whole lot easier. Once these were etch primered, painted and dried, I could start on the refitting on the interior tinwork. I started with the boot floor and the rear parcel shelf area. Now, as I said before, we were using black rivets to keep the amount of colours used to a minimum. If you are going to do this yourself, which I was, you must be very careful to ensure that you piece it back together in the right order. Remember this is the finished article, so no scratches or getting it wedged, bent or buckled, so plan what you do. As is usual, upon refitting these, we came across some packaging issues, where the pop rivet gun or the drill was tight. There are also issues to plan for, like if one rivet will be holding two panels and the access is hard and on top of that the one single biggest problem is...the fact that when drilling tube, you have to be dead centre on the tube, otherwise the drill will slip and you will break the drill bit as it gets trapped, then the remainder of the drill bit scrawls a nice pattern on your nice new powdercoated panel. So before you start on this, triple check what you are about to do, making sure as much as you can. You are drilling into the top of the tube and that the panel is in the right place and it is aligned with the panels around it nicely. Did I break a drill? Of course I did, everyone does, but I got away with it being in a area where you can't see it. It takes a lot of patience and time to do it nicely, plus make sure you have a real good selection of rivet sizes and a good rivet gun. When you are mixing old panels with new, you will get some panels with bigger holes that will need a bigger rivet body or head. As long as you have these to hand, it does not stop the job. All of the work done today was in between the rain that was pretty constant most of the day. This made painting quite difficult, but not impossible. Lastly we finished on the petrol flap fitting; in the end it was a quite simple solution and it looks cool. Now with most of the grey tinwork done, it's beginning to look more like a race car. We also spent quite a bit of time discussing how we were going to tackle the dash, so now we have moved from plan A to plan B with the dash. Next time, we will probably be on the dash fabrication. 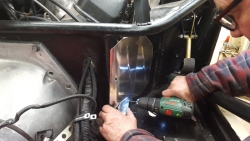
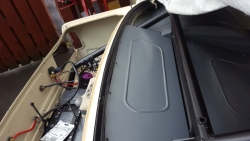
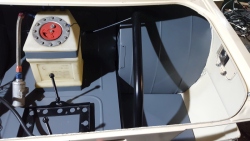
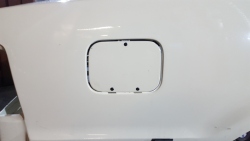
Sunday 5th March: Swap Meet Day - Myself, Mick Pusey (Gearhead Garage Head Honcho), Gary Springford (DRE Head Honcho), plus his sons Arron and Tyler made our usual insane early 5.00am Sunday start to sit in the queue for the NSRA Southern Swap meet. Weather was not helpful (heavy rain and wind) virtually as soon as we had our stall set up. I went to sell previously loved parts and a shopping list of parts I wanted for the Cortina and got most of them. They were more of a wish list really as you never know what or who will show up. I picked up a reverse pattern TH400 Cheetah Shifter as a spare, a very useful (read essential) 8 way Red Alert EGT system. If you loose an injector for any reason or have a fuel pump going away, this just might save your engine. Also an Advance Control Devices, three speed rpm activated shift system with override facility. These are rare as hens teeth over here, with first gear being so short, this will leave the driver free to focus on driving and not manually shifting as well. Then just small parts, new parachute bag, Brake Bias valve, Wheel studs, spare starter motor, etc. It’s the only Swap Meet really worth going to, people travel from all over Europe to attend this one and it's only once a year. Wednesday 8th March 2017 Sunday 15th January: It never got above zero today, but needs must! The season comes round real quick and cars don’t build themselves. I was recently looking on the Jerry Bickel web site and was quite shocked regarding how much they charge for Lexan window kits. It’s an expensive part to go and buy, I like making things, which is just as well, being as it’s a Cortina, you will not be buying a kit for it. Bill and I had drawn around the original glass as a template, but the screen is too small once you take the rubbers into account. Our Lexan screen will also sit higher so as to be more flush and not disturb the air as it flows over the car. Well that’s the plan anyway. If you want to attempt this job yourself, you will need patience; its one of those jobs that you must take your time with. If you make a mistake, then you have to start all over again. Also, don’t go and buy clear plastic sheet from B&Q, been there, done that, its not bad but it does have a tendency to crack if you catch it. So you will be making it more than once. The best thing is to buy a sheet from any of the chassis shops, Direct Plastics or Jack Brewster, who runs the Just Mustard Pontiac Firebird in Super Pro, who I use. It's more expensive, but it lasts and does not break easy and is fairly scratch resistant. These people pick the stuff that works best in this application, use their knowledge. Also this usually comes in 8' x 4' sheet, so you have to work out what sizes you need as sending an 8' x 4' sheet by courier does not work. When measuring up your screen, make sure you allow enough for the curves and the fact that they are never the shape you think they are. Some cars are easy, some are not, the Cortina was not, the shape was deceiving, in particular the rear screen. 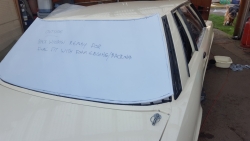
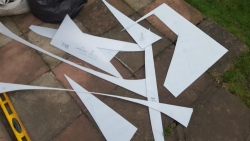
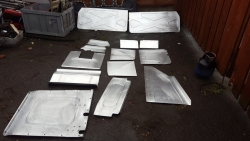
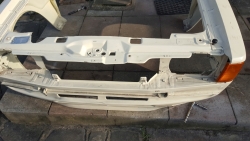
So I added the extra allowance all round that I needed and drew it out, then it was time to cut it out. Some people use jigsaws, I use a 1mm cutting disc and a 4 ½” grinder, the cut lines are better and there is less chance of it catching and cracking the material. You do have to be careful that the Lexan is the only thing you cut and not yourself. The cutting disc is also a lot quicker. Once I have the shape cut out, then it's on to the Cortina to make sure that it’s the right size. Inevitably, it's going to be too big, it’s a complex shape and you don’t do this every day so its much easier to take more material off rather than be too small. Then you start the process of smoothing it down to fit the framework that the screen fits into. I also pack out the frame so as it fits at the right height, flush in this case. The rear quarter windows also got cut out. I left the front and rear screens virtually ready to go in, but will leave the final fit until I have the window frames packed out and I am ready to bolt them in. That way I have a better chance of not taking too much material out. The other job was to remove all the panels that need colouring at the powder coaters. This includes the front splitter and rear spoiler, wheels, all the interior panels that we have made, plus all the small parts that also need colour. All the panels that we made need to be fettled to make sure that its all nice and smooth with no sharp edges. The last job today was remove the front, which still weighs a ton incidentally, you can just about pick it up on your own! We should be tackling the weight of that over the next week or so. Meanwhile all the panels that are going to be black were delivered to the powder coaters. I also took a lot of small items like wheelnuts and the bonnet catches that were chrome or ally finish and got all of those coated black so as to maintain the beige or black colours on the outside of the Cortina. Tuesday 31st January: Today it was Bill and I, so we both tackled different jobs. I had an idea for the door openers on the inside of the Cortina, I wanted something that was simple, not too elaborate or heavy. Plus as a driver I wanted something that I could get to with the window net still up preferably, it’s a bit of ‘Plan you escape just in case you need to get out fast!’ I suspected that I could attach an opener linkage to the same linkage that opened the door from the outside, and pop the opener out of the same hole the door lock knob uses. With a little fabrication, we made that part, and it worked really well and is easily accessible from the driver's perspective. Plus I used very little material so added no weight to speak of. All I had to do was go through the huge pile of parts removed from the Cortina to find the door lock knobs and linkage. Bill finished the fabrication of the boot panels, which are always a lot more fiddly than they first appear and are rarely seen, but still need to fit properly. Originally, Bill was going to make them in one piece for each side. But the shape was too complicated with too many curves, so they got remade as two pieces each side, no they won't be seen much, but it's attention to detail that makes a car. Nearly all the panels that we have made were folded using a really cheap and handy folder that you can buy from Machine Mart, its under £100 and allows you to make a lot of panels, with folds and edges, etc. The bead roller is a more expensive piece, but you see used ones for £200-£300 and are well worth it; you need formers for the beads and drops and, if you practice, you can become pretty good, but do allow extra material for mistakes! 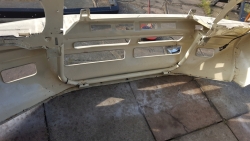
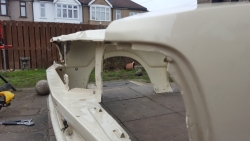
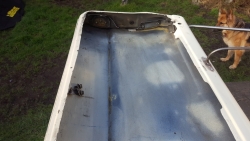
I moved on to the one piece front that I must say I had been itching to get started on again. I got a fair but of weight out of it the first time round when I removed all the factory underseal and some metalwork, which took about 10-12lbs out, and added the front splitter. This time round I was after more weight reduction, starting with the headlamps. Both weigh 6 lbs each, so they were leaving. Then it’s a case of removing what you can around the headlight surround and indicator mounts. The rear of the wings lost a little, there was also extra weight to lose from the framework that tied it all together. Being a road car, it had a flip front for ease of access, but once we fitted the front splitter, it could only be removable to gain access. No problem for a racecar, so the extra support could now leave as well. Then it was just bits and bobs, but in total I got another 20lbs out of it, which I was comfortable with. There was also the opportunity to streamline the front a little. After removing the headlamps, I used some ally sheet to fabricate a nice snug fitting piece to fill the gap left by the headlights, but also I made sure it was a flush fit to make it virtually airtight. This would mean that the air would hopefully flow more smoothly over the wings and front of the bonnet and less turbulence would be created, more downforce and less drag. It took some doing, tucking the top just under the bonnet leading edge, but the end result looks like it will work quite nicely. Our last major job to tackle on the Cortina had kind of been the Elephant in the Room. Bill and I cut out the dash a while back, so as we could gain better access to the motor for servicing it. As I said before, it was the only extra job that we added to the project, but it was a big one. Because along with that, we were also going to move the steering and remake the pedal box area around the driver. The seat position in the Cortina is fine, no problem, but the pedal box area is really small; I have quite big feet (size 12) which meant it was quite drivable, but could be made more roomier by moving the steering shaft higher. By doing this, it also meant that the steering wheel could be moved closer to the driver as the rake would be more shallow. Initially Bill and I had avoided this job as the plan was to do it at the Comanche Racecars workshop, but like most chassis shops, the quiet time in January never happened so getting it in there was becoming a problem. So the decision was made to at least look at it at now. The other really hard part was how in hell to design a dash for it. You see, the problem is, all American fibreglass dashboards for any car are LHD and the Cortina is not LHD. So no help there, we would have to design one from scratch. Plus, with the motor being mounted so far back, there was a lot of dash area to cover. Add to that the fact that being a European car, it's quite small inside, and you still want to put some gauges where the driver can easily see them. So as a packaging issue its quite a challenge, and it has to be removable for serviceability. Naturally it took a little while to work out how to do this; initially it looked like we were going to have to remove the whole 'picture frame' (a style of popular transmission mid mount that ties into the chassis very strongly) along with the corresponding chassis bars and move it all up around 8-10 inches. This was to allow more leg room and improve motor accessability. But when we looked more closely with me in the Cortina, it soon became apparent that we could possibly leave the picture frame and chassis bars alone and just move the steering and remake the firewall around the driver's pedal box, and thus achieve the results we were looking for. The design for the dash then started to take shape; with the frame staying, we knew where the dash had to land as nothing was moving. With this job now being potentially a lot simpler, it meant that Bill was a lot happier with tackling this job away from Comanche Racecars, as it now would involve nothing structural. So we agreed that this plan was best, as there was absolutely no reason to cut the chassis. There was still enough time in the day, so I gave Bill a new cutting disc for his favourite piece of equipment, the 4 ½” grinder. Within 30 mins, the steering shaft, steering wheel, etc was gone and all the extra room in the pedal box area was there with the firewall reshaped. Great news really, as this means that we are now into the last major fabricating job of the project. There is still plenty to do but once this job is finished, all the remaining jobs are mainly the reassembly and some more colouring. 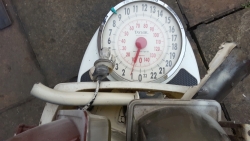
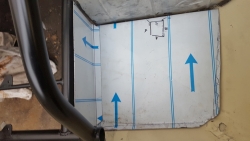
Thursday 2nd February: Today saw me collect the black powdercoating from KK Chroming and Coating (call Mick on 01708 749255), there was plenty of it, but powdercoating does not come off so, with the wheels, spoiler, front splitter, wheelnuts, fastners, etc, so there was a lot. Then it was off to see an old friend, ex Super Comp National Champion Paul Knight, Paul had some pieces that I really wanted. With the Cortina, you have the very latest technology in Drag Racing, the race car with a serious power adder, in this case Twin 88MM Turbos. With this kind of car there is a lot more hot exhaust pipe under the hood, plus it has an EFI fuel injected motor. Drag racing cars are subjected to a lot of violence, which can take a toll on parts. Every time I drive any race car I accept before I get in one of these that I can crash, and I have to accept that it's possible that it will happen. If you cannot accept that then don’t get in one. I am quite comfortable with the way these doorslammers are built, I know if I crash I will survive pretty well. Having wrecked twice and walked away from two pretty nasty ones, I know these chassis do their jobs. Oh and don’t think your driving skills will save you and it won't happen to you, it plain just don’t work like that. In my opinion, one of the new areas of danger is the use of EFI on these motors, in particular boosted combos. There has always been a risk of fire in any race car, which is why the sport has rules and regs for firesuits, crash helmets, gloves, race boots, etc. Personally I feel that if I had a fire in an EFI car it will always be a bad one due to how much pressure the fuel injection works with and how fast the fuel will spray out if a fuel line gets damaged. This is a personal choice, but I will be wearing a pair of Funny Car boots and gloves and will be getting a Dash 15/20 Race Suit, plus I will be wearing a full face crash helmet with a fresh air supply feature. You don’t have to do this, but do remember that the safety regs state the minimum that you should wear. The reasoning is simple, this level of protection is exactly what my good friend and new 2017 shoe for the Shockwave Funny Car Steve Ashdown will be wearing and if it will keep Steve safe, then it will keep me safe. 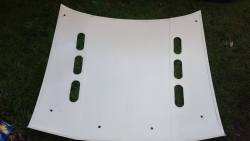
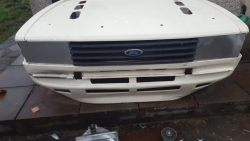
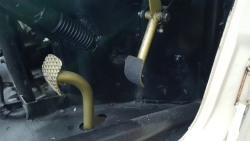
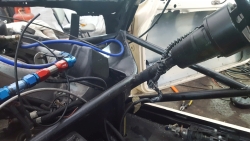
Sunday 5th February: I got my hands on the one piece front for the final lightening. With the Headlamps removed and the indicator surround gone, I focused on whatever else could leave. Its all small stuff now, nothing big, I also trimmed some material from the front lower mount assembly by half mooning the tubing and trimmed some more off of the front wings, then got rid of the last of the rubberised underseal in the hard to reach areas. Bill had pointed out that there was some underseal on the underside of the hood and there was some framework that could also go. So that was taken care of, the hood weighed 6 lb less and the front had lost in total now about 25lb. That is most probably it for the weight loss part of the project. So once the Cortina is finished, we can see what the results have been. If we achieve a weight of around 2750lb without driver, that will be pretty respectable for a Twin Turbo car that started out at over 3200lb, considering that around 100lb has been added with the extra tubing for the 7.50 tag, the anti roll bar and support tube, plus the wheelie bar. Friday 9th February: Bill gave me a list of parts that we needed to fabricate the new steering shaft. I called Chris Isaccs to ensure he had the pieces we needed, usually you use ¾ inch tube for the shaft, that makes it real easy to weld on the quick release spline for the steering wheel to attach to. Also we needed the outer tubing and some nylon to make the bearings/bushes. Chris had what I needed in stock tubewise, so a quick drive down to Basildon and I had the tubing, I elected to use chromoly as its lighter, a little more expensive but worth it. I also picked up a sheel of 8' x 4' ally to fabricate the new dash from Alco Sheet Metals also in 'Bas Vegas'. I managed to track down the nylon bar at Senor Engineering in Romford, really nice and helpful engineering company who can make or cast virtually anything. Sunday 19th February 2017 Wednesday 21st December: It's been a week since we last touched the Cortina, and so had to get back into the swing of things again. Bill and I had a very important job to do today, which was putting everything back together and seeing if we could get the Cortina started up and running. One of the most important things to be monitored during the whole build is to ensure the ECU, EFI injection, fuel pumps, ignition etc still all function and nothing has been damaged. The Cortina had been apart and not running for quite some time now; I really wanted to get it running again to make sure that all was still well. The whole of the boot area had been removed along with the fuel tank and all the pump mounts, plus all the grinding and cutting. You always do your best to protect stuff but you just never know.
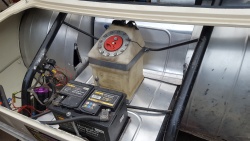
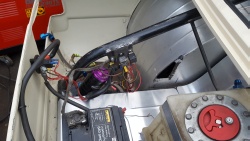
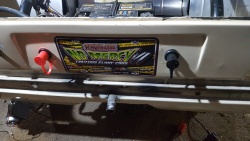
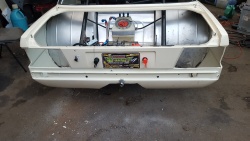
The fuel lines had to be extended to reach the smaller tank with new fittings and fresh pipe, (I always make a point of using new stuff, old is always bad news with perished pipe or bad seals on fittings). Then I remade the battery fittings and pump mounting brackets, cleaned them off and reconnected all the EFI stuff. This was after a thorough clean of the interior first, paint dust, no matter how well you protect things, gets everywhere. Lastly I cleaned out the fuel tank and fitted the battery. I am very pleased to say that once we had fuel in the tank and checked for leaks and there were not any. The motor fired up first time absolutely no problem or drama. I could not run for too long just a few minutes as there was not a huge amount of fuel in it, just a gallon. But it did what we wanted it to do, which to be honest was a cracking result. If it didn’t fire up a huge amount of time would be lost on the project finding the problem - time that could be spent finishing it off. It did not look like there was too much more to do but when you list it all out, it was still a lot of time required to get where we wanted it to be. We repaired the rear tubs as well, and fitted the charge posts to the rear of the car. Wednesday 28th December: It was a little cold and foggy, so Bill and I decided that the door frame and Lexan Window fitting was the job for today. When Bill said it would take all day to do this, I thought he was joking but as it turned out he wasn’t! To save weight, the whole window frame had been removed. No a lot of chassis shops do this, they simply replace the doorglass with lexan. That is a pretty straightforward job, just use the existing glass as a template and cut round it. But to really get the weight out, the window frame has to go, so that's what we did. This makes the window job a lot harder and a lot more time consuming. You have to work out where you want the top of the window to land getting the door shut. Also the doors always have shape in the frame and you have to replicate that, plus you need to support the frame and where the lexan is positioned. As you may have guessed, it looks simple but to make it look right and work, that’s a whole new ballgame. I wanted to tuck the window in as far as I could, so the wind had less chance of getting underneath it and ripping it off. 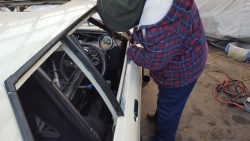
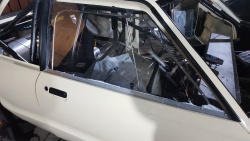
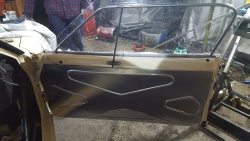
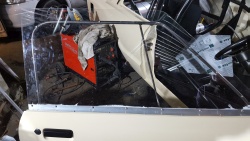
Yes it did take all day, part of it fabricating and part of it going through different ideas on how to make it look right and function. Well after seven hours of two of us on it, plus fetching small parts and pieces, we were both happy with the result. If you look at the pictures (this is not the finished car as it will have to be picked apart and coloured before its final fit) you will notice that we used a tube that we could rivet the lexan directly to, this meant that we did not have to fabricate loads of tabs to fit the lexan to. To do that, double the time we had already spent – no thanks. We were more than happy with the end result, but still have to work out the door opening catch from the inside. Friday 6th January: A lovely winter's day, time to tackle the front brakes; the Cosworth ventilated discs and Willwood 4- pot calipers on a four stud front axle needed to go. I got a pair of Chris Isaccs Racecars Ally 5 stud Hubs, which are a straight bolt on to the Gaz double adjustable front shocks, plus a pair of lightened Capri solid discs that bolt virtually straight to the hub from Burton Power Products just down the road. I will also fit a pair of ultra light Wilwood two piston calipers, again from Burtons. These are a brand new product from Wilwood, very similar to the Strange ones. All of this will mount on a 3 ½ x 15 inch Centerline Warrior wheel and a Frontrunner tyre. The weight saving is quite impressive. Wheel and tyre 6lb, hub 4lb, disc 5 lb, caliper 4 lb totalling 19lb per side. Not bad, plus the four pot calipers would have locked up the front runners really easily, so would need to go. The two pots will be a lot more gentle, comparing the Cortina to the PT Bruiser. The Cortina has a little more weight, but the PT Bruiser has no problem stoping, I brake from nearly 170mph with no chute at Santa Pod. The Cortina always uses a chute as well, and so should be easy to stop. So those are the parts we will be using; there will be more later on fabricating the mounts and making it all work. Sunday 8th January: The rear chassis in the boot area needed repainting, it was the second to last piece of painting to be done on the main body and with the air temp warm enough, it was the job for today. I decided to strip off all the paint so as to get a good finish. If you try to paint over the existing surface, you always can see the lines. Prior to that I fired up the Cortina again and got her up to temperature. For me, it's important to fire it up every now and again to ensure everything still works fine. It also helps you monitor how much fuel it uses in a warm up. I decided to use a clear fuel cell so it is very easy to see how much fuel you have and how much you use. That way, when you are stuck in the staging lanes for a while, you can calculate if you still have enough fuel for the warm up and the run. At the moment it looks like it uses around a gallon from stone cold to up to temp, this is with gasoline. The Cortina will only carry the fuel it needs to warm up and make one pass. I have also noticed that when it gets warm and comes off the cold start fuel programme in the ECU, it runs a bit woolly and rich, then once it's up to its running temp tune, it clears. I also ran it so that I didn’t have to drain so much fuel from the tank. As I was going to paint the rear chassis, the battery, pump and tank had to be removed. It took the remainder of the day to finish rubbing down, masking and painting. But now it's done, I can see it was one of those jobs that needed doing and it looks 100% better for it. Tuesday 10th January: We finished the passenger side door window frame and fitted a Lexan window. There was also some work to remove the door locking system too. I always like to do this, so as you cannot get accidentally get locked in! It also removes more weight. Bill and I had to bend the tubing so as it matched the other window and then fit it. It’s a long job as it's fiddly, but you want to do it right and not make a mess of it and then have to do it twice. Plus you have to ensure that they are both the same so it looks right aesthetically. Using the original glass windows, we marked out the cut lines for the new Lexan front and rear screens. There was no chance of me doing it on my own, it’s a two man or two pairs of hands job. Monday 23rd January 2017 Thursday 24th November: Bill and I spent the day on the Cortina, today was focusing on remounting the battery, fuel pump, water injection pump, remaking the floor panels in the boot centre. While Bill was on that I got cracking on finishing off lightening the battery tray and making it look right. Then went thru the same lightening process with the passengers side door and finishing off the drivers side. Then for good measure I removed the sunroof, which even shocked me, the total weight of the sunroof and assembly was 15 lbs!! Sunday 27th November: With no Bill today I could finish off the boot, remove the rest of the double skin and anything else that needed to go. This is a long process and you have to be careful, 4 inch grinders with cutting discs take no prisioners, particularly when you have to remove the guard so as you can get in the tight spots. Once that was done and the whole area was smoothed out and prepped. I treated it to a coat of primer filler, paint and laquer to seal it. In total another 16 lbs were removed and just to finish I hollowed out the rear light assemblies. Tuesday 29th November: Time for all the remaining windows to leave, so front and rear screens were removed. This weighed in at 50 lb. Bilk and I also took the decision to make the passengers side floor removable for ease of access. The boot area had the new floor fabricated, also Bill fabricated the door panels, then we bead rolled them to add pattern and strength. Sunday 4th December: With the screens now removed it was time to paint a border on the screen surround, so a day spent rubbing down and cleaning the screen frame ready for paint. Time consuming but we had decided to keep the original paint so it was important to be careful to keep it tidy. A lot of masking up to deal with the overspray, then 3 coats and lacquer to seal it. Took all day but I was happy with the result. I also prepped and painted the doorcaps on each door in Cordoba Beige as Bill and I decided to ally panel the door panel not the whole door. Again a time consuming process as I was not going to remove the door so a lot of masking up. Tuesday 6th December: Fabricated the passengers side floor panels, fitted the Dzus tabs and fitted the Dzus. A quite long job but well worth the effort. With the windows removed I could now remove the last of the interior that was not needed. This amounted to another 15 lb removed. This is where you could say the crying started!! Well not really, but remember I said don’t deviate from the plan, well we did. But just a little. Both Bill and myself decided that although it would require a lot of extra work, the dash would be replaced and a new one fabricated. The reasoning was simple, it was built in such a way as it was a road car, now being a pure race car, by remaking it, we could save weight but also make access to the motor a lot easier. With no windscreen wiper required it changed everything, so it all left!!! It just made too much sense to replace it now, before changing the plugs was real hard work and so was doing the valve lash as the front of the dash stayed put, now it would all come out in one piece. Sunday 11th December: Removed the last of the interior pieces that were double skin, it most probably took another 15 lb out of the Cortina. Now there was virtually no more cutting and grinding to do so I can now colour the interior. This is another real time consuming job, but it always makes a lot more of a difference to the car than you would first think. A lot of people don’t do this as its fiddly and laborious. The way I tackled it was this. Firstly I sprayed all the rollcage, I used Satin Black and as all the glass and the sunroof is still out I could get to all the bits that had never been painted. This is common as it is so difficult to hit everything with paint from the inside, some areas you just cant get to. But you can with no windows and the sunroof out. This is relatively easy to do and does not need a huge amount of masking, its all close range stuff and black satin goes on quite easy. Just make sure it’s a reasonably warm day as paint don’t like cold, remember I am doing this outside. Once this was done then it was time to work out what would be painted on the interior and start to mask it up. I decided to do the whole roof, windscreen posts, and inside of both rear quarters and the rear roof posts in Cordoba Beige. So as to give a real contrast to the Satin Black roll cage. As I said this is a real labour intensive job. I spent 3 hours masking up the rollcage and did not get it all done. Tuesday 13th December: A lot more masking to be done, the remainder of the roll cage, then the interior and the floor. After I had finished that, the entire outside of the car, with paint which I am far from an expert, its just what I have learnt along the way. I am a rattlecan painter!!! I got the local paintshop to match up the body colour, mix me up a litre and then I just have them make me up some cans from that paint, with an activator in it so it goes off quite quickly. Where I had removed double skin metalwork from the interior it leaves very sharp edges. So I rubbed down all the surfaces and used 120 grit paper to take all the sharp edges off after using a sanding 4½" disc in a grinder to take off the worst. You simply cannot spend too much time on prepping the job before you paint. So another 4–5 hours later and I am just about ready to paint. I can tell you now this is a real labour of love by now, it just takes so long to get to this stage and then trying to paint and hit everything is real difficult. First of all I put on a coat of etch/primer to ensure that the paint stays on there. I used a beige etch so as it kept the interior nice and bright. Once you have that on and have worked out the right distance so as not to get runs etc. Its time to let it dry and then go for top coat, once that’s on and you have been over it a couple of times to make sure its got every bit you wanted to get, which means painting inside and upside down and backwards and forwards, outside and from above etc, I am sure you get the picture!! Lastly hit it again with lacquer to seal it and give it a bit of protection and shine going thru the inside upside etc routine again. Then as soon as its able to, start taking off all the masking as soon as possible so as not to pull the paint when its dried. All in all a very long day of hard
work but the results speak for themselves. Well worth all the effort.
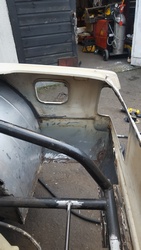
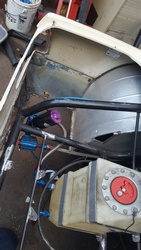
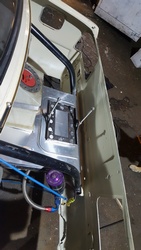
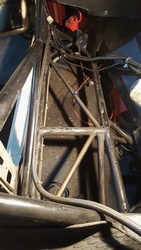
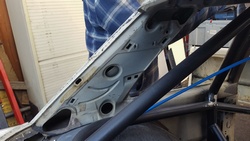
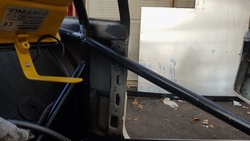
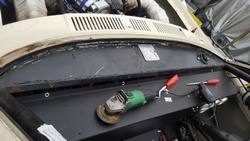
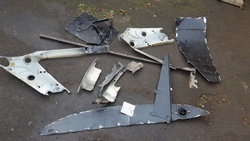
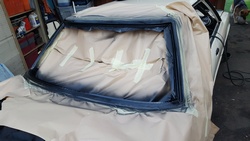
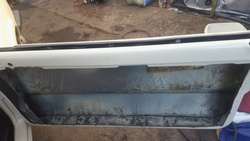
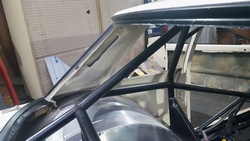
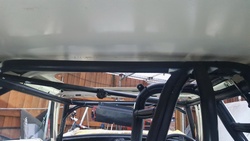
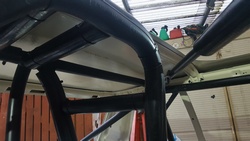
Wednesday 28th December 2016 The Santa Pod testing had been very successful, in fact better that we expected. We were only looking for 60ft and 330 ft times and with 60ft times on a RWYB track of 1.25 and then a 1.28 with less grip, its smashed the Cortinas PB into next week. So very pleased with the result. November 18th the carnage begins!!! So with all our goals completed, its time for the next stage... weight loss!!!!!!! Having already built a few doorslammers, now I know that weight is not your friend. This is something that a lot of people don't realise but the day I see a 25 stone man outrun Hussain Bolt over 100 metres I will eat the Cortina!!! You see so many race cars get built and little or no attention is paid to the weight of the parts being fitted, it astounds me. When I bought the Cortina it weighed just over 3200lb, now some weight has already been removed with the loss of the full exhaust system and some housekeeping in the front end, the passengers seat, etc. But that's it, then we added weight with, the front splitter, the Anti Rollbar, the chassis tubing to upgrade the chassis to 7.50 spec, Wheelie Bar etc. So the net loss was only about 100lb. Firstly I spent a lot of time just looking at it, you have to have a plan and the way my mind works I have to look deep into it, devise a plan and stick to it. I got Bill Felstead to pass by so as I could run my plan by him as I needed his opinion as to if I could do what I had in mind. My plan weight loss plan was pretty ambitious and I wanted to ensure that I would not compromise the structural integrity of the shell. Remember a race car is built with a full tube chassis, everything is mounted on the chassis, it is the load bearing part of the car. ALL the bodywork needs to do is give the chassis shape. Which means that the rules that applied when the car was manufactured by Ford no longer apply as the strength is in the chassis. The body just needs to supply shape. What you want is a single skin race car, so anything that can leave, leaves as long as the body has enough strength to not collapse, in
particular at speeds approaching 200mph. I don't mind telling you that this is my most ambitious project yet. But just take a moment to
think about the rewards.
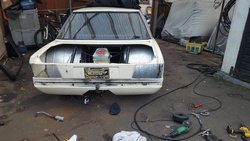
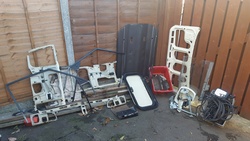
I am seriously going to take as near 400lbs out of this Cortina, along with the 200lbs I have already removed. So that means the net total weight reduction will be 500lbs or in new money 230kg. As we all know the rule of thumb is 100 lbs equals 1/10th faster ET. So if I use that rule and reduce 500lbs, that makes the Cortina 0.5 seconds faster. Think about that for a moment, how much more horsepower would you need to make a 8.60 second race car an 8.10 second race car. Well the answer is nearly 200 - 300hp, not just that, but everything else in the car has a much easier life and is subjected to less strain as the amount of weight it needs to move is so much less. So how do we do this? I must say Bill was amazed in what things weight, to the extent he had to get on the scales and then I handed him the part so he could see just how much weight we were removing. We started with Bill removing the Fuel Tank, this was leaving as it was a 15 gallon rectangle Jaz plastic tank. Due to its design you
had to always have it half full to ensure the pump would not run dry under hard acelleration, so you carried 5 gallons that did nothing.
By changing that for a 3 gallon upright tank you saved the weight of the tank vrs the smaller one – saving 10 lb, plus the 5 gallons of fuel
37.5lb. Removing the tank mount was substantial, a saving of 6lb, plus the battery which was huge for street use could now be downsized for
race only to a diesel transit type, saving 26lb. If we go for an Ion one we can knock off another 30lb.
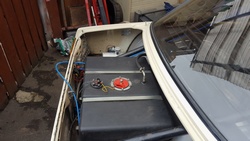
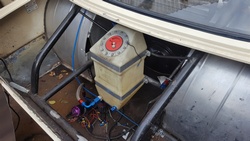
Whilst Bill was still trying to get over how much weight came off so easily, I started on the doors. Now you do have to be a bit careful with doors as you have to make sure you don't ruin them and you pick them apart carefully. This is a very rare two door model and I would not want to have to find another pair. That said with what I had in mind there wouldn't be much left!! Okay this is what ended up on the floor. Window Glass, winding mech, door panel, interior opening mech, all the metal behind the door pad and lastly the window frame as I wanted to fit one piece Mylon frameless ones. There is quite a bit of work involved but the end result looks really cool. Also with what needs to go back in the doors will weigh at least 25lb less each which is a 50lb saving just there. 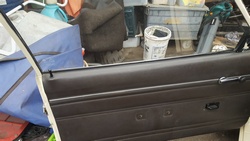
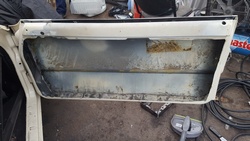
So in just finishing what we started today we will take 130-160lb off depending on battery choice. All in all a good start. Sunday 20th November 2016 I needed to get the boot area done so as Bill could start remounting the fuel pump, new fuel tank, water injection tank and pump and
the battery tray and battery. I needed to get all the weight out first which involves a lot of cutting and grinding, so best I get started.
Just as well, it took a lot longer than I thought it would. You don't get second chances so I had to be careful not to damage the exterior
paintwork if possible. Also not cut any of my fingers off which is also possible!!
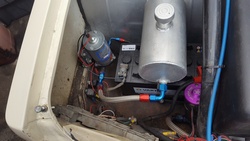
The Bumper was going to be remade in Aluminium but I managed to thin it down enough to get 6lb out of it and still retain a stock appearance, so I was happy with that, it now weighs 4 lb. I was also mindful that the bumper supports the rear wing so it needed some strength to sustain the pressure developed by the wing at speed. The boot area had some double skin in places so that was what was leaving, I got half of it done and got 14lb out of it, so with the rest and the light assemblies it should be 30 to 35lb weight reduction in total. I was also impressed that I lost none of the bodyshell integrity, quite often when you remove so much the body sags a little and you have to add supports to get it back. On the Cortina no sign whatsoever, its still solid. So total weight removed today once the boot is finished is another 40lb. That makes the running total 170-200lb. Monday 5th December 2016 Okay just a quick bit of background on this project before we get started. I have always wanted one of these cars, a Twin Turbo big block Doorslammer race car that is, I was looking at this being the kinda car that I would have to import from the States. But when Jon Hollingworths Twin Turbo Cortina came up for sale, it just ticked too many boxes not to at least go look at it. So my good friend and his son Gary and Aaron Springford (Drag Race Engineering) and I went to have a look at it. It was primarily used by Jon who had owned it for 20 plus years as a street car. Yes it had a 8.50 chassis tag and had run in Street Eliminator for quite some time. Well after some research and talking to Jon Sleath at Jon Sleath race cars who has built the car and maintained it for all its life really. I decided to buy it and a deal was done. The plus points were, the engineering on it was all Jon Sleath, (you can check out Jon's own web site to see the Cortina in its early days and the build up) so I know it is sound and practical, which to be honest suits me perfect, I simply could not justify tying up the thick end of 100K ukp in a race car that you only get to use at a max of 10 times a year, the value for money is just not there. So this came in on budget, but would require quite a lot of work as it's a street car primarily with an mot and taxed. My plan was to see just how fast we could get it to run as a pure race car. So no street tyres, instead, slicks, wheelie bar, race gas and a diet and make it look like a race car put some urgently needed Aero on it). I can honestly say that like most of you, drag race turbo cars are a dark art to me. I know them to look at but why and how they have evolved I had no clue. So what you will see in this blog is how we got on with understanding how these things work. I hope you enjoy the journey as much as we will. This is exactly how it looked when I collected it, note its got that sleeper look about it.
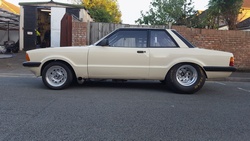
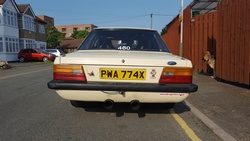
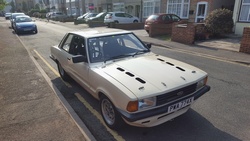
This is the spec: Ford Cortina Mk5 2 Door Mid Mounted (virtually) 510ci SVO Block Big Block Ford, Trick Flow Heads and Intake. Roller Camshaft, Roller Rockers, Forged Crank, Rods, etc, etc. All the parts you need to be able to live with 1600hp on pump gas. Fuel Injected with a FAST management system (ECU) One set of 8 Race Injectors. 2 x 88mm Hybrid Turbos Jon Sleath design. Water to air cooler system with pumps and radiator. Stainless Headers and mountings – Whole system designed, constructed, installed and mapped at Jon Sleath Race Cars. MSD Launch Control. Fast Data Logger that WORKS PROPERLY. Transmission – JW Pro Mod Spec TH-400 with reverse patt shift. Convertor – JW Turbo Spec custom converter. Chassis Full Tube 8.50 (will go 7.50 with one additional bar). Suspension – Gaz all round double adjustable. Axle Ford Nine Inch with strange Iron Center Section. Wheels – Centerline Warrior 6 x 15 front, 15 x15 Rear. Weight 3400+ lbs with driver. Performance Fastest to date 8.58 seconds, 172 mph. 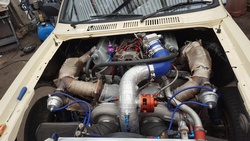
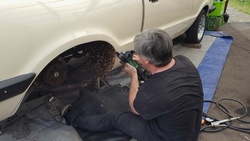
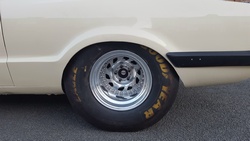
Why Beige? Jon Hollingworth or Moose to anyone who knows him actually painted it that colour, not my favourite colour. But I kinda figure it might be cause Jon Sleath simply hates the colour. As they have been very good friends for about as long as Moose owned the car, it's a guy thing. At this point I must say that this is all Bill Felstead's (Comanche Race Cars') fault, as I bought the Cortina and was just content to look at it and decide what I was going to do and when. But Bill was round one Sunday in July and said "Okay let's just spend a day bullshitting the car and see where we get to". I can tell you now, its been 100% on the Cortina for both of us ever since, when ever we have spare time. I have always admired Bill's eye when it comes to making things look right and we bounced ideas off of one another. So this is what happened. We first of all worked out what simply had to be done before it went to the track. We weighed it. Without driver it's 3200 lbs, which is heavy by most race car standards, but looking at it prior to buying it I knew that there was weight that could come off. I also knew that this was a real step into the dark. Turbo cars work so different that you really have to learn and understand them before you can get started on it. So I have been reading books and learning from everyone I can. Let's go racing! First thing that you must always do with these kinda projects is MAKE A PLAN AND STICK TO IT. If you don't do that it never gets finished, costs too much, plan runs out of time etc, etc. There are workshops all over the country with those kinda cars, not this one. So this is what we did, with the plan being to make Shakespeare County Raceway's Open Sport Nationals. The Cortina was built around Mickey T's Street Tyre, the block tread type. So it soon became apparent that fitting slicks would not be straightforward. After some measuring and checking, we found a slick that would fit and would also take the weight of the Cortina. As you can see above you can hardly tell the arch has been altered. The front was already removable but was a little complicated, so we simplified this by replacing the hinge mech at the front with quick release pit pins. Then I ground out all the factory underseal from the front wings, primed it and painted. This saved 6 lb in weight with a couple of other bits I got 10 lbs out of this piece. The fabrication of the front splitter took quite some time, but was desperately needed.
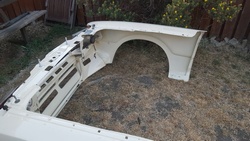

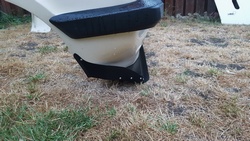
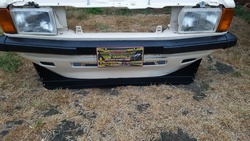
To fit slicks instead of road tyres, this was not easy as the car was built around a block tread Mickey T. We could have gone the Drag Radial route, but having competed and attended radial tyre events in the states, ie No Mercy and Lights Out at SGMP, over here slicks are the way to go. The rear arches needed a little work to make the slicks fit, we are using a 32 x 14 x 15 Goodyear with a stiff sidewall. The brakes also received an overhaul and were detailed.
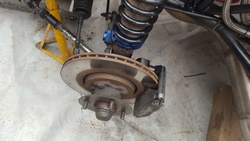
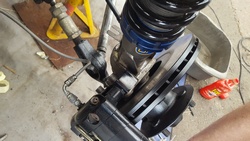
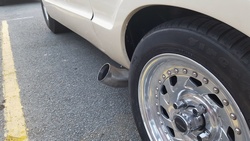
Next was dump the full exhaust system which is heavy and not needed anymore. Instead we designed a set of ‘Cowhorns' which has the exhaust exiting as quick as possible, back pressure of any kind in a Turbo car is a bad thing, particularly with twin 88s. We lowered the Cortina as much as we could, 1” at the front and 7/8ths at the back. I also cleaned off and removed all the factory underseal from the front wings, then primered and painted it all. As previously mentioned, this took a couple of days but it took 10 lbs off of the weight of the front clip. Plus made it look a lot tidier. Also the windscreen wipers, motor and the horn were removed. Aerodynamics Having already been involved with Aero work with my PT Bruiser, which we discovered had 400 lbs of lift on the rear when in the wind tunnel at MIRA, I knew in
advance that the Cortina was in trouble. The main problem was air underneath the car causing the whole car to raise itself at speed. With terminal speeds in excess
of 170 mph in its previous set-up and no aero on it at all I knew what to do to start with. Front splitter and rear spoiler were designed by Bill and myself. Once you
know what you need it's a case of building and fitting it and then fine tuning at the track. Having a lot of experience of what they should and should not feel like, it's
a logical process.
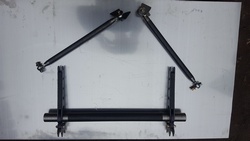
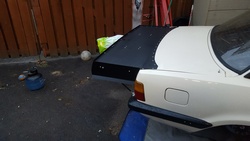
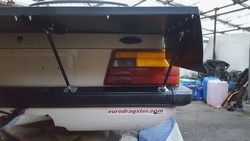
Weight loss This will be an ongoing job, but to start with it was simple things like removing the passengers seat, removing all the factory underseal from the front clip. Full exhaust system, passenger side seat belt, etc. Just by doing these simple things we took 100+lb out of the car and more as the parts we were fitting eg, front and rear splitter and spoiler and wheelie bar were adding weight. Appearance After a lot of thinking, although I personally hate black interiors, I decided that it would involve so much work to change the colour. I would have to strip the car down to virtually a bare shell. If I wanted the car out this year then the black needed a lot of tidying up but it was worth trying. Then after even more thinking I eventually decided that for now at least the exterior colour would stay Cordoba Beige. My thoughts behind that were, the more it looked a race car the less the colour would annoy me!!!! To be honest it's never going to look like the PT so I went for a North Carolina Grudge/Quick 8 kinda look, with the Mk5 Cortinas having virtually no chrome on them I decided to take that further and black out everything and make it look mean. This is how it looked at SCR. I refurbed the chassis, the wheel tubs, the whole interior and the engine bay. The front brakes were also given the treatment as was the boot lid that was single skinned
which saved and additional 20 lbs.
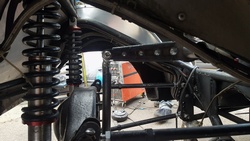
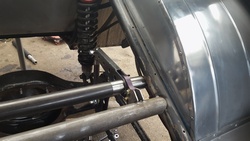
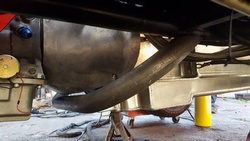
The début August 2016 Well even after we finally got the Cortina finished enough to get to Shakespeare there still were a few jobs to be done prior to getting onto the track. The first being sorting out the front geometry and tracking. As we had lowered the car the camber was now all wrong and needed doing again along with the tracking. There were also the travel limiters to fabricate – Let me just take a little time to explain. Originally running in Street Eliminator, as most of you know is a street class, you run pump gas (real hard to do safely and reliably which is why most Eliminator cars nowadays run turbos). Plus you must run road legal tyres, which don't work very well on a drag strip with a heavy car and little grip. To help this the 4 link is set up to help the car as much as it can. When Bill and I looked at the current set-up, you could immediately tell that the guys who set this up Jon Sleath and Jon Hollingworth were no fools and the setup was optimal for what they were doing. On race cars you can work out the IC instant center and the squatline. From this you can set the car up to do what you think it needs to do which in the case of Eliminator cars is usually squat and transfer as much weight to the back tyres to help them hook on the start line. Think slow and soft. Now by fitting slicks which will provide a lot more grip which means that we can go at it faster and harder, now moving the 4-link to hit faster and harder with the intersection point above the antisquat line as opposed to below. I hope you followed that. Now that its hitting harder thats why you need travel limiters on the front suspension so as it makes the whole car react faster as it stops the rotation that helped the car when it was slow and soft, the travel limiters make it faster at reacting and so help promote it moving forward and driving off of the startline. What you want is to get it moving and up on its tyres as soon as you can, that way it covers more distance early on the run and reduces ET and builds speed quicker. Throughout all of this work one think I must say was utterly faultless was the motor and trans, even after having a lot of bits off and on again. The motor always fired up first thing and the trans also never gave us any trouble. The weird part of it was the way it started. Anyone who has had a race car will tell you drag race motors can be temperamental, but not a fuel injected motor. You hit the starter and it bursts into life no drama then just sits there idling away without a care in the world. In the past we have broken starters, broken ring gear teeth, even burnt off people's eyebrows (Gary Springford) but not with one of these. I must also say that for the sake of fairness and to give us something to measure against, the tune in the motor is unchanged. This is how Moose ran it, our first objective is to see just how fast an Eliminator spec car can run as a race car, i.e. slicks, wheelie bar and race gas for added safety. The launch rpm, boost etc all remain the same. First Run SCR had had some good weather leading up to the event so the track was awesome right from the get go. On the first run all I was looking for was a 60 ft and top of first gear really. Burnout was good, a lot of smoke in the car but got that out okay. My plan was to run solo and go into full stage (Super Pro so Sportsman Tree) then build up the boost and ping it. With a turbo car you have to build up boost whilst on the trans brake, so in I go hit the trans brake release the footbrake and it just rolls thru stage – no transbrake. So I reverse up and reposition the shifter until I have first and the transbrake. Now I wait to see if the starter will give me another chance, but he is not interested so I stage wind it up a little and ping it. It hooks right a little so I am off it quite quick. With the steering wheel nearly upside down I really have no idea where straight is, so I complete the run and drive back to the pits. Next pass after the burnout, I stop and check that I have the rather unpredictable shifter in first and the transbrake works before arming the data logger. Do it the same go into full stage, transbrake it, spool up the turbos, then ping it. This time again it seems to like right, but I manage to control it but on the shift it doesn't, so I have to double hit it to get second and click it just before the eighth mile. This time once back in the pits we have data to download. Jon Hollingworth the previous owner very kindly gave me all the previous data in his very well kept log books plus the laptop with all the previous data logged files so as I can compare the new runs with previous. So upon downloading, all looks good but although I spooled the turbos up, it was not nearly enough as I only had .9 lb of boost off the line. Everything else checked out so we
turned the Cortina around again and went down for Q3.
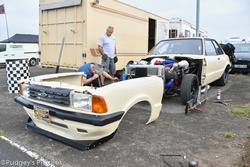
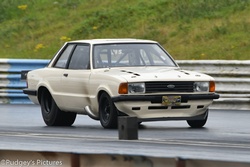
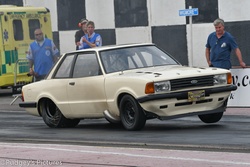
This time I was starting to get a little more comfortable with driving the Cortina so decided to pre-stage it, then spool it up and use the bump box to stage it like you are supposed to. Burnout was good, selected first , checked that I had the TB as well, then armed the logger. Pre staged, then spooled up the turbos, bumped in and then they run the tree. I noticed it sounded a lot more angry and with the gates popping and banging away and with 5 lb on the boost gauge, I knew we were ready. I also noticed out of the corner of my eye flames coming out of the cowhorns. So I pinged it, got about a foot and the rear UJ failed, I shut it down immediately, no one was hurt, the chassis did its job of protecting the driver. I did kinda think we would break something before the weekend started, I just didn't know what, now we know. The propshaft is history, the axle yoke was also damaged, I called Eric at JWs who confirmed that the sprag in first gear is almost certainly damaged, the track locator for the rear axle is also trashed. But unlike the Monza axle explosion in UK Top Sportsman 2015 and on U-Tube with over 3 million hits now, the tinwork has survived! Tuesday 31st August: On the phone and placed wanted adds for the parts list, ordered the Transmission parts from Eric at JW Transmissions in Rockledge Florida. Sunday 4th September: Tore the Cortina apart with me Bill Felstead and Sefton Whitlock so as repairs could be taken care of, sent the transmission to Terry Robbins of Robbins Race Cars. Sunday 18th September: With Customs taking 10 days to clear and deliver our transmission parts the Test Day this Friday is not looking promising. It's the final piece in the puzzle. I had been busy during the week, having picked up a spare set of 3.40 Pro gears from Ray Tucker along with an ally pinion support. Bill Felstead at Comanche located a 31 spline spool so as we don't have to refit the locker which saves a lot of unnessasary work. Plus a Webster made propshaft was donated to the cause again by Bill at Commanche for shortening. Chris Isaccs at CIRC sourced the heavy duty propshaft end required, along with the moly tube to remake the wishbone track locator and the C-Clips and the heavy duty UJ. Sunday Bill and Luke Felstead and PMR Car Chief Sefton Whitlock convened for the day on the Cortina. Sefton and I go on with housekeeping, some of the pipes and cables. Plus
I made a master cylinder cover, Bill warned me that small stuff takes far too long to make and he was dead right. Plus I remade the rear wing supports as the steel struts weighed
nearly a pound each, the ones I remade with ally tubing weigh 3 oz each!
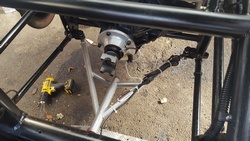
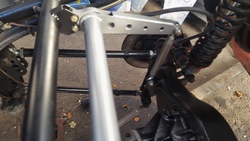
Big thank you to the Floridian department of PMR Tony Morris who carried over a Pro Series anti roll bar for the Cortina. Tony passed by with another very good friend Jon Dewey to go through a couple of old stock alcohol carbs. I bought the rollbar from Corky Markqart at ART, I have known Corky for about fifteen years now and I trust his judgement. Corky advised using the stronger Pro Series one due to the weight of the car. Then it was time to collect the third member from Gary at Drag Race Engineering, Gary always does my third members, I wouldn't use anyone else. Got some spacer shims from Russ at Customville so as we could build the ally pinion support, Pro Gears and 31 spline spool into the Strange third member casing. It's all small pinion, but its what it came with and should be strong enough. If its not and breaks then we will upgrade and build it stronger. As I said before this is all new territory for us, so we are learning as we go. Wed 29th September: Collected the TH-400 from Terry Robbins at Robbins Race Cars, all done and ready to go back in. Sunday 2nd October: Bill Felstead, Luke and I got cracking on putting the transmission back in the Cortina, to be honest with the small removable floor panel parts, it was not as difficult a job as Bill and I envisaged. Although it did involve using an engine crane to lower the transmission in. Both Bill and I like our fingers just the way they are and did not want to lose any. Yes a TH400 Trans is very heavy and everything is pretty tight in there. With all this done, the following Friday it then was time to fit the propshaft, unfortunately the propshaft was faulty. This put paid to us attending the Saturday Night special at Santa Pod and the Sunday RWYB. So we had the propshaft remade and managed to finally get the Cortina to the very last RWYB of the season at Santa Pod. Sunday 30th October: Santa Pod Raceway RWYB Weather was a little cold and the RWYB was busy so we only got two hits. All I wanted to do was ensure it all worked and nothing broke! First hit it went right off of the startline, which is what it was trying to do at SCR. We had paid special attention to make sure it was dead straight. So we now knew
it was in the chassis. Bill Felstead took one flat out of the Preload and then back out for the second hit.
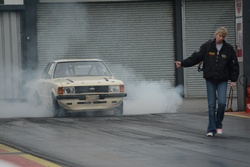
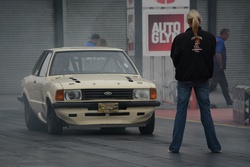
Got it out to 330ft and second gear, then it started skating real bad so I clicked it. It didn't feel too bad inside the car, but the crew on the startline were shouting at me to lift!! It had still gone a little right on the hit, but no so much and I pulled it back without too much drama. Feature ©Eurodragster.com Latest Blog Back to Racer Blog index |